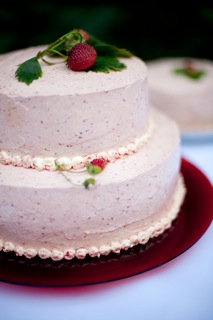
Vanilla Velvet Cake with Strawberry Curd and Strawberry-Kirsch Buttercream
More than three months after the wedding for which I made the above cake, I am finally going to share some photos and stories. Now, as I gear up for my brother’s wedding it’s fun to reflect back on the last wedding in which I played a small culinary part.
I had never before made a wedding cake. And I didn’t hesitate for long when Margo asked if I would make hers. She’s a very good friend, the wedding was not going to be huge and I had plenty of time to test, learn, fail, test again. . . .The wedding, however, was going to be populated by foodie/wine types with sophisticated palates so the pressure was on. In hindsight, the pressure was all entirely and needlessly self-induced and Margo never contributed to it whatsoever. The guidance she gave me was that the cake be centered around strawberries since the wedding was going to be in late June in Oregon. Fair enough!

Margo, Me, the cake, and Ian
I’ve made strawberry rhubarb pie; roasted strawberry and balsamic tart; strawberry ice cream; strawberry shortcake; and strawberry jam, but I did not realize at the outset of this project how challenging it is to get a true, strong strawberry flavor into a layered cake. Luckily the Cake Bible came to my rescue on this matter. The best way to accomplish this strong, fresh strawberry flavor is to pick the best berries you can find–not an easy task during this cold, water-logged spring–freeze them whole, then thaw them (this helps break down the membrane), then strain them, then reduce that juice significantly and finally mix with the blended pulp, a little lemon juice and touch of sugar. And voila! you have a super concentrated puree. I substituted this puree for the lemon juice in a classic lemon curd recipe to make the cake filling. It was delicious! I had tried both stabilizing the plain puree with gelatin and mixing it with whipped cream but neither of those fillings held up well enough with the size and weight of the cake layers and would not have cut or transported well.

Thawing Strawberries

Strawberry Puree
My next challenge was cake flour. I tested cake after cake made with cake flour–the hyper-processed, bleached , soft white flour that gives typical wedding cakes and other special occasion cakes that signature fine crumb. However signature it is, it often reminds me of grocery store sheet cakes. My test cakes tasted sort-of fake and like the smell of the plastic trays they come on. Then came the color. I wanted a really pale, almost white cake to create a nice contrast to the strawberry curd filling and buttercream and, however, tasty some of the cakes I tested were, they were too yellow. After testing half-a-dozen base cakes, I landed back on the first one, Grand Central Bakery’s Vanilla Velvet Cake. It uses just egg whites and all-purpose flour and holds up very well, both in structure and flavor.
My dear pastry-chef-friend Ellen not only lent me her cake pans and ideas (the strawberry curd was her idea) but her sophisticated palate and showed up with her husband–an excellent eater and critic in his own right–on a regular basis for taste tests.
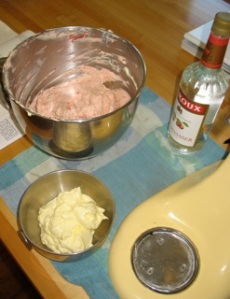
The buttercream was actually the least complicated part of the cake. The Cake Bible once again had the answer in Neoclassic Buttercream that I also flavored with the strawberry puree and just a touch of Kirsch. The puree lent the buttercream a wonderfully marbled, reddish-pink hue and the Kirsch cut the richness just a bit. I’d make another wedding cake just to have an excuse to test and eat that much buttercream.

Strawberry/Kirsch Buttercream
The trickiest part of the whole wedding cake project I think typically is baking perfectly flat cake layers. The instant give-away of the cake made by the novice is the sloping, slanted look noticeable even with the slightest asymmetry. The Cake Bible has elaborate tables with equations for avoiding such slanting affairs. It all has to do with the leavening and how to decrease it in proportion to the other ingredients as the cake layers get bigger. I was careful and followed her instructions–by far the most complicated math I’ve found myself doing in my adult life. I weighed the batter for each pan precisely and ended up with very even layers.
I also had done lots of research on the assembly and how best to support the layers: dowels, drinking straws, etc. I had purchased my cardboard cake circles at the Decorette Shop as well as an off-set spatula (the most important tool of all) where I had seen all sorts of crazy things I didn’t know existed including shelf-stable strawberry cake filling in a plastic bag. I did not ditch my strawberry curd plans for said, bright red filling. . . .And I happened to have a beautiful red glass cake plate from my grandmother that just fit the cake so I was able to avoid the foil-wrapped board.
I filled, frosted and assembled the cake the day before the wedding in a house all to myself. Ellis was at my mother’s and Brian was off watching a World Cup Soccer game and I cranked up the music (Bruce Springsteen I think) and went to work.

Assembly!
All the research and prep paid off. Everything worked and at the last-minute I remembered a trick I had seen on one of my favorite baking blogs to create a marbled effect with the buttercream. I left a bit of buttercream plain and gently mixed in some of the strawberry puree in the pastry bag and used that to pipe on my borders. Finally I decided against the flowers the wedding florist had set aside for the cake and went to my back yard and picked real strawberries with their stems and leaves and used those for the final touch.

Marbled Buttercream

Voila!
To make a now very long story a bit shorter, the trip to the location of the wedding (actually two trips since the restaurant sent us back home with the cake as they supposedly didn’t have anywhere to keep it for the few hours until the wedding!) was by far the most stressful part. But the buttercream held up despite the warm weather, the bride and groom loved it and we had plenty to go around.
And yes, I would make another wedding cake but again only for someone I know and love. I will not be going into the wedding cake business. The Cook With What You Have philosophy is a bit at odds with all those structural and visual needs of a wedding cake!
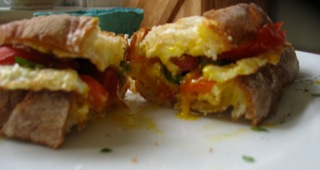
 And finally, I made this tomato and goat cheese tart from David Lebovitz’s wonderful collection of recipes for a recent brunch with friends. It was quick because I had pre-made tart dough in the fridge. The dough itself is quick and easy to make and this recipe doesn’t even mention letting it chill before using so if you’ve got company for lunch or dinner or brunch, it’s a winner and far easier than it looks.
 And my dear brother Ben who is getting married on Saturday! I can’t wait!


