Skip to content

Archive for

Kissin’ Wears Out, Cookin’ Don’t!

I heard this one for the first time yesterday at a talk I gave at the Alameda Tuesday Club, a local Portland philanthropic and social group with a fascinating 100-year history. Judy, the woman who shared this said that it is an Amish saying and I knew I’d find use for it right away.

And I hope there’s some truth to it because I think I’m on the verge of wearing you all out with root veggies. Next week you’re going to get a break from them for sure but this week I am eager to answer some of the questions that surfaced from last week’s post. I received inquiries about what to do with parsnips and cabbage so here we go.

On the cabbage front this gratin and this soup should serve you well. I was also asked about how to make cabbage a little more kid-friendly and in my experience the below recipe for Japanese Cabbage Pancakes (Okonomiyaki) is a great way. Please report on how they go over.

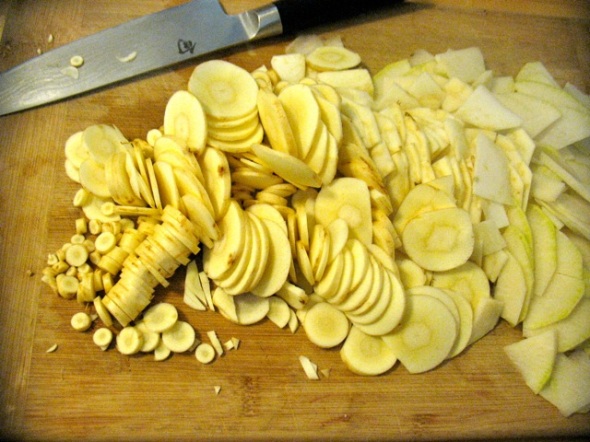
Sliced parsnips, celery root and rutabaga.

Now to Parsnips, which are inherently very sweet and if fresh, very tender. Their core can get a bit woody and fibrous if they have been in storage for a long time but before you cut out the core (which is kind of a pain to do), taste a thin slice raw and you’ll be able to gauge whether or not you can keep it. Chances are you can especially if you’ve gotten them from a farmers market or CSA box.

Parsnips are wonderful additions to this veggie hash or these latkes. However, for a dish where they truly shine, try this light “cake” in which they are paired with celery root. Often gratins are heavy on the cheese and/or milk.  However, in this version, some simple broth or stock  (or veggie bouillon) provides the moisture and thyme, salt and pepper are the only seasonings and the result is light yet sweet and rich from the veggies themselves.

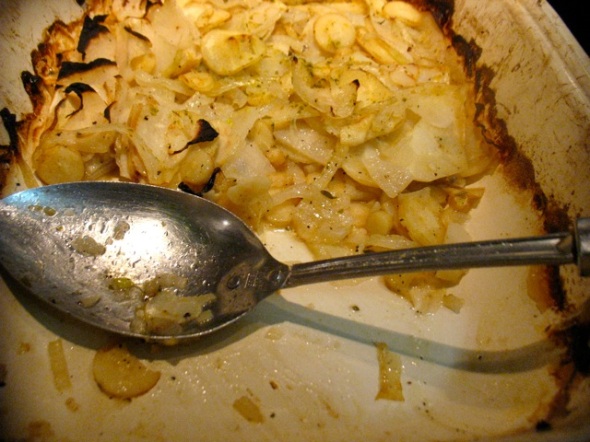
Parsnip and Celery Root “Cake”

It would be awfully hard to wear me out on root veggies and winter produce in general so I definitely stand by the Amish saying (at least the latter half!).

Lastly, I have a couple more spots in this Saturday’s Greens Class (a short and inexpensive class) and  have posted  a handful of new ones!

Happy Cooking and Eating!

Parsnip and Celery Root Cake
–adapted from Tender by Nigel Slater

You can make this as written with parsnips and celery root or substitute rutabagas or turnips for the celery root. I’m sure potatoes and sweet potatoes would be comfortable in the mix too so feel free to use it as your use-up-random-veggies dish if you need to. I made the dish pictured above with parsnips, celery root and rutabaga and it was delightful.

As I note above, parsnips can have woody and fibrous cores but if they are quite fresh they probably don’t and you don’t need to cut out the core. Taste a thin slice raw and see how it seems. I’ve found that parsnips I buy at the farmers’ market are quite tender all the way through, even the really big ones.

You want to slice your veggies very thin. A sharp knife works great if you’re comfortable and a bit practiced and the food processor is a good alternative too.

1 large onion, thinly sliced
1 large or 3 small (or 2 medium!:) parsnips, scrubbed and thinly sliced.
1/2 a medium celery root, peeled and thinly sliced
4 tablespoons butter
1 teaspoon fresh or dried thyme, chopped up a bit
6 tablespoons vegetable broth or stock (I use veggie bouillon)
Salt and freshly ground pepper

Preheat oven to 375 Degrees F.
Toss the sliced onion and veggies in a large bowl with they thyme, at least a teaspoon of sea or kosher salt and plenty of pepper. You need to be generous with the salt.

Put the butter in a baking dish and place it in the oven while it’s preheating. When the butter is melted add the veggie mixture and combine well and pack the veggies down as evenly as possible. Pour the stock or bouillon over the mixture. Place a piece of wax paper or aluminum foil over the veggies and press down firmly. Bake for an hour and then remove the foil and turn your oven up to 425 (or to broil if you’re in a hurry) and cook for another five minutes or so until the top is nicely browned and the veggies are very tender.

Japanese Cabbage Pancakes (Okonomiyaki)
–adapted from Food52.com 

These pancakes are fantastic. They make a light supper with a salad on the side. Don’t be put off even if you don’t love cabbage. They are quick, cheap, and I have yet to encounter any resistance to these, adults and kids alike. Traditionally they include shrimp though I always make them without and love them that way but by all means add 1/2 cup of chopped shrimp if you like.

Makes about 12-18 pancakes (depending on how big you make them).

Sauce:
Scant ½ cup mayo
Scant 2 tablespoons soy sauce
1 tablespoon Sriracha (or other hot chili sauce)

Pancakes:
3-4 large eggs
1 teaspoon soy sauce
1 teaspoon sesame oil
1 – 1 1/2 teaspoons sea salt
1/3 cup all-purpose flour
4 cups cabbage, finely sliced
1 small bunch scallions, trimmed and chopped (or 3 tablespoons or so diced red or yellow onion if that’s what you have)
Olive, coconut or peanut oil for pan-frying
1-2 tablespoon toasted sesame seeds

Whisk the first set of ingredients together for your sauce. Set aside while you make the pancakes.

In a large mixing bowl, whisk eggs with the soy sauce, sesame oil, and salt. Gradually add the flour until incorporated. Fold in cabbage, scallions, and shrimp. Warm a tablespoon or so of oil in a skillet over medium-high heat until glistening. Spoon the batter into the skillet in whatever size you like. I make them about 4-5 inches in diameter. Cook on each side for about 3 minutes or until golden brown. Keep pancakes covered in a warm oven as you make the rest. Scatter sesame seeds on top of pancakes and serve with dipping sauce.
Winter Recipe Challenge

Garlic, yellow onions, russet or purple potatoes, Napa cabbage, collards, carrots, parsnips, beets, and rutabagas. . . that is the text I received last week from one of the farmer’s I work with. This is the list of produce members of the farm’s CSA received this week.

I get this list a few days before the share pick up and go to work collecting, testing, and adapting recipes to accompany the produce. It is particularly fun doing this work in the winter as we are blessed to live in a place where one truly can eat locally year-round. And since the bounty is actually so diverse here in the winter I have eaten well for many winters (buying at the farmers’ markets here) without eating many, if any, rutabagas or turnips. With this new gig, however, that’s changed and I am forever grateful.


So the winter recipe challenge is as follows: If you have been or would like to be buying local produce this winter and are curious how best to prepare something new to you.. .. or if you need a new idea for an old standby, post a comment below and I’ll do my best to respond next week with ideas or recipes. Or if you have favorite tricks and recipes, please share those as well!

The choices are certainly fewer this time of year than at the height of the growing season, however, the possibilities are not. And by having one’s grocery shopping choices eliminated (or narrowed) by the farmer (or the market vendor) we can spend our creative energy making the most of these delicious veggies that have stored up a summer’s worth of sun for us to enjoy this time of year.

And if you are curious about CSA (and happen to live in the Portland area) I will be teaching a class with Shari Raider of Sauvie Island Organics on February 4th where we’ll not only cook with local veggies but have Shari on hand to answer questions about our winter (or any season) veggies, the connection between farmer and eater and all that goes into growing food. Join us for what’s sure to be an interesting few hours of good cooking and conversation. I will be working with Sauvie Island Organics this year to create recipe packets for their CSA as well and if you sign up for their share this month you get a nice discount on any/all Cook With What You Have classes this year.

On another local note, Slow Food Portland is hosting a panel discussion on small-scale meat processing in our area. The event is next Thursday, January 26th. Visit Slow Food Portland for details.

Don’t forget to submit your comments with winter veggie questions or favorite preparations of yours, and check back next week for lots of new ideas on how to prepare them!

Happy Winter Cooking and Eating!

Genius Recipe


That’s a risky title. When I worked at a restaurant many years ago the chef, wisely, noted that you should never call anything the “best this” or “world-famous that”. . . it’s annoying, it’s highly subjective, so on and so forth. I think this falls into a slightly different category. The folks at Food52 ask folks to submit genius recipes and I believe they define them as just plain smart, unusual, surprisingly delicious, and/or unexpected in their simplicity and success. I’ve been meaning to submit this recipe to them but in the meantime, here it is. And it has an irreverent title to boot!

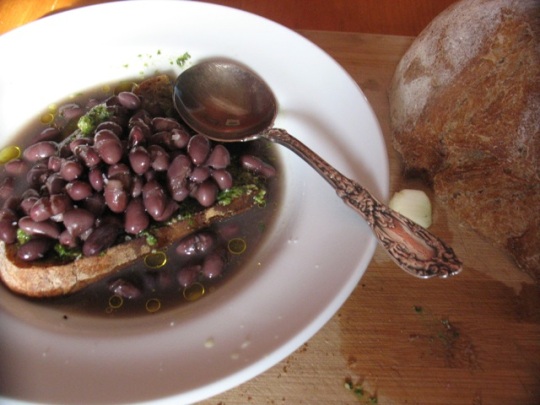
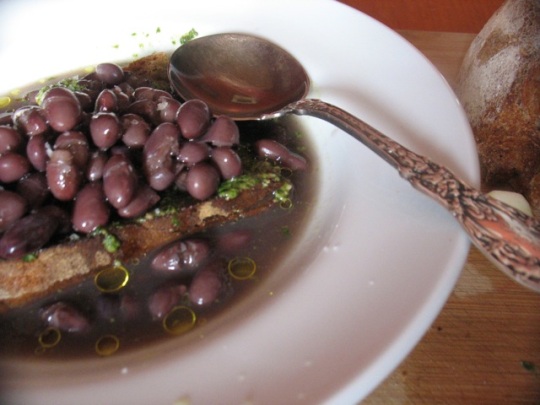
It’s toasted bread, rubbed with garlic, slathered with pesto and doused with brothy black beans. That’s it and it’s really, really good. Make it and tell me when you do and what you think.

Zuppa Bastarda (“Bastard Soup”)
–inspired by Carol Boutard (of Ayers Creek Farm) who got the recipe from Nostrana which got the recipe from Anne Bianchi.

Bastard soup is so named because it uses black beans, which are called fascistini in honor of what Elda Cecchi calls “that black shirted bastard who brought Italy to the brink of destruction during WWII.”

It’s very simple to make. And if you have previously cooked black beans with their broth on hand by all means just use those. The garlic and pesto on the toasted bread add lots of flavor so don’t be put off by its simplicity.

1 ¼ cups dried black beans, soaked (or 3 cups of cooked black beans in their cooking liquid, see headnote)
6 cloves garlic, peeled
1/2 medium onion, peeled and cut in half
2 tsp dried crumbled dried sage or chopped, fresh sage
6 3/4-inch thick slices good bread, toasted
Salt to taste
Freshly ground black pepper
6 tablespoons basil pesto
2 tablespoons extra virgin olive oil

Drain the beans and place in a soup pot along with 3 cloves of the garlic, the onion, sage, 1 1/2 teaspoons kosher salt and enough water to cover by 2 inches. Heat to boiling over medium heat. Reduce the heat to low, cover and cook for 25 – 45 minutes or until beans are tender. Cut the remaining garlic cloves in half. Using half a clove for each 2 slices of bread, rub the bread with the cut sides of the garlic until the bread is perfumed with the odor, spread about 1 tablespoon of pesto on each slice. Divided the slices among 6 bowls and pour the bean soup into the bowls over the bread. Drizzle with olive oil. Serve hot.

Happy Cooking and Eating!

P.S. I’ve posted a bunch of new classes, shorter, cheaper and with new subject matter, including one for youth/kids and pantry stocking/quick meals one.

I used Black Basque beans (grown by Ayers Creek Farm in Gaston, Oregon) this time around and they have a much lighter hue when cooked. Usually I use Black Turtle beans which are much darker. It works well with both or probably any other kind of black bean you have. Getting the best, freshest beans you can find is always good though.


Ode to the Box Grater and Unconventional Latkes

I use my box grater most days. I’ve been grating carrots and rutabagas and making “latkes” with them. I’ve been grating beets and turnips and carrots and making a salad with toasted sesame seeds and a lemony dressing. I’ve been making celery root remoulade the classic French salad of grated raw celery root with a creamy mustardy dressing (though I use Greek yogurt instead of mayonnaise). I’ve been making delicata squash pancakes and grated sweet potato and regular potato and parsnip pancakes.

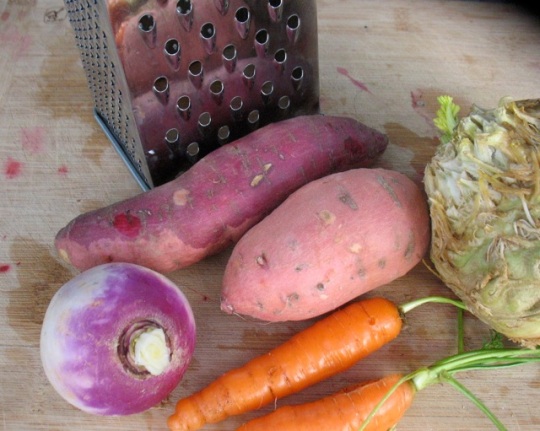
Turnips, sweet potatoes, celery root and carrots, the latter pulled from my garden this morning. . . These were the roots I happened to have around today but so many others--parsnips, rutabagas, beets, potatoes, winter squash--lend themselves to grating.

I love my food processor and its coarse grating blade too but I’ve reached for the good old box grater more often lately. It’s easy to clean, lives in a central drawer and requires no moving, assembling, or non-human power.

And tools aside, these grated concoctions are winners. There’s no better way to enjoy (or get unfamiliar veggies into skeptical tummies small and large) than grating them, mixing them with a light batter and pan-frying them into crisp, spidery pancakes.  Nor is there a better way to put a wintry salad on the table since the grating softens the veggies and enables them to soak up zippy dressings with lots of herbs and acidity.

In addition to writing about box graters and root veggies I had planned to write some sort of New Year’s greeting, but this morning I read this post and have been thinking about it ever since. I hope you enjoy it as much as I did. And I’ll just say what a pleasure it is to cook with the beautiful produce our fabulous farmers grow and that I hope to increase access and knowledge and comfort with it, both with new and familiar folks in 2012.

And finally, there are lots of new classes posted, including another round of the Eat Better Series, which is a great way to start the new year. So if you received a gift certificate for a class or have been wanting to take one or would like a “tune up” I’d love to see you here.

Happy New Year!

I shouldn't really call these latkes since they have cream or milk in the batter but they are worth trying with most any root veggie you have on hand.

Rutabaga and Carrot “Latkes”

I referenced this recipe last week and received quite a few questions asking for more details and a real recipe so here you go.

This is more of an idea/technique than a recipe and it’s not an authentic latke. Be that as it may it’s a great, great way to enjoy winter (especially root) veggies. You can also include or substitute turnips, celery root, sweet potatoes or potatoes. The quantities listed are approximations and can be adjusted based on what you have on hand, your taste, etc. For the below recipe you want about six cups of packed, grated veggie.

1 smallish or half a larger rutabaga, peeled and grated on the large holes of a box grater or shredded with a food processor
3-4 medium carrots, scrubbed and grated (same as rutabaga)
½ a medium onion, finely diced
2 tablespoons chopped fresh parsley (or oregano, mint or chives or about a teaspoon of chopped sage or thyme, fresh or dried) optional
2 eggs
¼ cup flour
½ – 2/3 cup of cream or whole milk
Salt (at least 1 teaspoon kosher)
Freshly ground pepper
A few tablespoons of oil for pan-frying
Greek yogurt or sour cream for serving

Let the grated veggies rest, sprinkled with a little salt, in a large bowl while you prepare the batter. In a smallish bowl whisk the eggs with the flour and cream, salt and pepper. Squeeze out any excess liquid from the veggies with your hands, a big handful at a time. Return to the bowl; add the onion and herbs and finally the batter. Mix well. Taste for seasoning before you start frying. Under salted latkes are no fun.

Heat a large skillet over medium-high heat with a tablespoon or so of olive oil. Scoop large spoonfuls of the mixture into the hot pan. Flatten each one a bit with a spatula. Leave them alone for a few minutes until the sides start getting crispy and golden. Flip carefully and continue cooking until both sides are nicely browned. Eat hot topped with Greek yogurt or sour cream.