Skip to content

Posts from the ‘Odds & Ends’ Category

Quince, Squash, Beans – Simple Fall Pleasures (& a New Class)

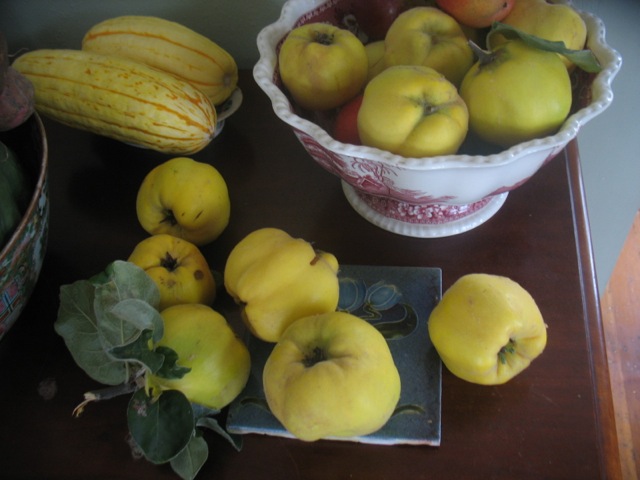
quince and delicata

When you cook and adapt and create recipes every day it’s easy to get swept up in the many variations and tricks that are certainly fun but not always necessary. And a few of  the teaching projects I’m currently working on are forcing me to strip things down to the very simplest preparations, to really practice what I preach– that cooking can be liberating, a way to frankly make life less complicated rather than more; that cooking can be simple, creative and just plain fun, not to mention delicious, economical and convivial.

It still feels like fall has just begun since the weather here in Oregon is warm and glorious, however, the produce at the markets clearly marks the passing of summer and early fall. The peppers are gone and cabbage is here and so is winter squash in its many sizes, shapes, and flavors. And this year’s crop of dry beans is arriving and my quince tree is loaded. This week I was feeling overwhelmed by the fairly labor intensive ways to preserve  quince (my dwarf  tree produced 50 quince this fall!) so I decided to simply bake the whole unpeeled fruits in a covered pot, as  I was already roasting beets. And voila, after an hour the quince had become sauce and I just needed to pick out the cores and stir in some honey.

quince ready to bake

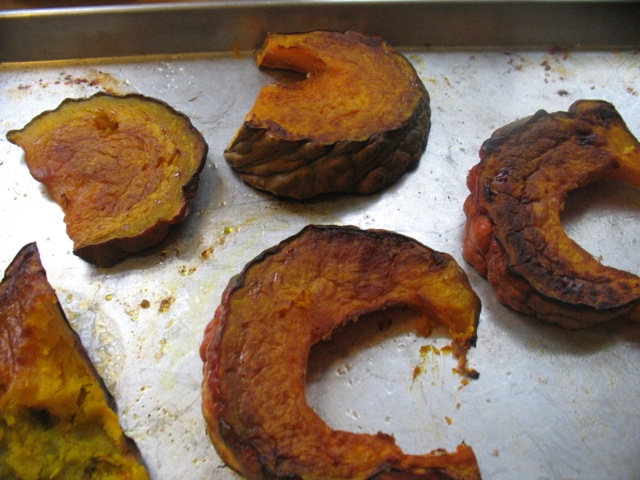
The beauty of this season’s produce is intoxicating and I’m reminded that even this time of year, the hard, grainy quince and the unwieldy, weighty winter squash can be prepared and enjoyed with ease. And in the case of the latter it can be sliced and baked and enjoyed with nothing more than salt and maybe a little olive oil or maybe some salsa verde.

roasted squash wedges

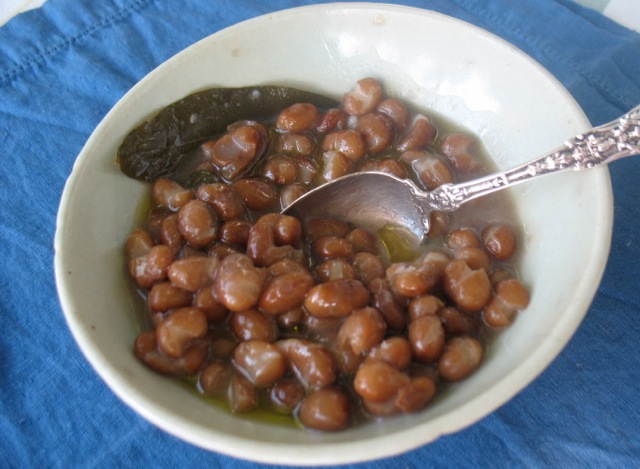
And then there are beans! The humble, wonderful and under appreciated dry bean I love so much. I just ordered 30 lbs of pinto beans from one farm and will be loading up on other varieties from another soon. Nothing makes me feel more secure than big jars of beans in my pantry. Soaked and then cooked with a bay leaf a clove of garlic and chunk of onion and then left to cool in their broth, . . .then a sprinkle of salt and drizzle of oil and lunch is served.

bowl of beans

And put the three together–wedge of squash, bowl of beans and quince sauce for dessert-simple indeed!

And speaking of fall and what the changing temperatures and products mean for the kitchen, I’m co-teaching a class with Ellen Goldsmith who will bring her experience with Chinese culinary philosophy to our evening of conversation over dinner and would love to have you in class! Details below:

A Taste of Autumn: East meets West at the Dinner Table

Are you wondering how to make your autumn cuisine delightful, delicious, and inspired? Join Ellen Goldsmith and Katherine Deumling for an evening of conversation and eating just for autumn. What does this season’s food tell us about our bodies, our vitality, and our appetites? Katherine will bring her cook-with-what-you-have approach to delicious, produce-driven dishes for this abundant but cooler time of year.

Ellen will offer an overview of the Chinese medicinal and seasonal culinary philosophy as it applies to the autumn season to enliven your cooking.

Infuse your fall season of cooking and eating with a conversation over supper. We will discuss:

• The elements of a vibrant seasonal meal

• To utilize local and seasonal produce in a new way

• The benefits, from a Chinese medicine perspective, of cooking with the season

• How tastes of different foods energize your cooking and you!

You will receive materials, including the evening’s recipes.

When: Tuesday, November 5, 6:30 – 8:30 pm

Where: Home of Ellen Goldsmith in Northeast Portland (Address available upon registration)

Cost: $60/person

Ellen Goldsmith, licensed acupuncturist, brings a passion for cooking and food with over 25 years of experience practicing Asian medicine and teaching all about the vitality and potency of food through the lens of Chinese medicinal principles. She practices acupuncture, dietary therapy, Chinese herbs, body-mind health, and Mindfulness Based Stress Reduction at Pearl Natural Health in Portland. In addition, she shares her passion for transforming our lives through our health on her weekly podcast Health Currents Radio and as a board member at the National College of Natural Medicine, the oldest naturopathic medical school in the country.
Why Not? Add a Spoonful . . .

Brothy Pinto Beans with Harissa and Parsley

Brothy Pinto Beans with Harissa and Parsley

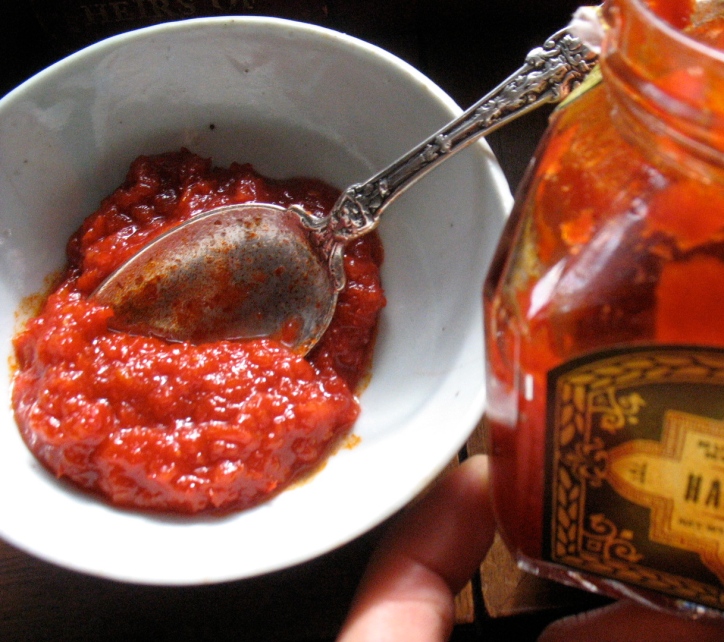
of Harissa to my plain bowl of brothy beans for lunch? Why not do the same a few days later with chickpeas and top them with garlicky sautéed mustard greens and feta? This was such a success that I taught it in a recent class and I’ve noted the recipe below. I use this wonderful smoky, spicy paste in this greens and bulgur dish and have been reaching for it this winter to enliven eggs, bowls of rice and now beans. There are lots of recipes online to make your own Harissa and my favorite store-bought brand is Mustapha’s.

Why not? has become my new teaching refrain as well.  It of course goes hand in hand with the cook-with-what-you-have approach of substituting and adapting on the fly and is a catchy enough reminder to not be bound word for word to recipes and thus make cooking more fun, less stressful and more satisfying.

A spice paste often from Morocco of chilies, cumin, garlic and oil.

A spice paste often from Morocco of chilies, garlic, lemon and oil.

I’ve had a couple of successes with the why not? approach lately. I added lots of sliced, raw leeks instead of a little onion to a gratin of root vegetables. Not sure why I’d never done that but it gave the gratin a lush, silky sweetness. I filled burritos with pinto beans and sautéed chard and roasted tomatoes. I made the Cauliflower Pasta Risotto that I wrote about here with Brussels Sprouts and bacon. And last night I thinned down heavy whipping cream with milk since the cream was so thick I thought it might not whip into a nice light topping for my son’s birthday chocolate pie. It worked beautifully! Sometimes the why not? approach is less successful as in the time I added some homemade vanilla extract (vodka plus vanilla beans) from a very fresh batch of extract to heavy cream that I whipped for some dessert and the cream tasted sour from the vodka that had not yet really been infused by the vanilla beans.

Have you had moments like these? Successful or less so? I’d love to hear about them.

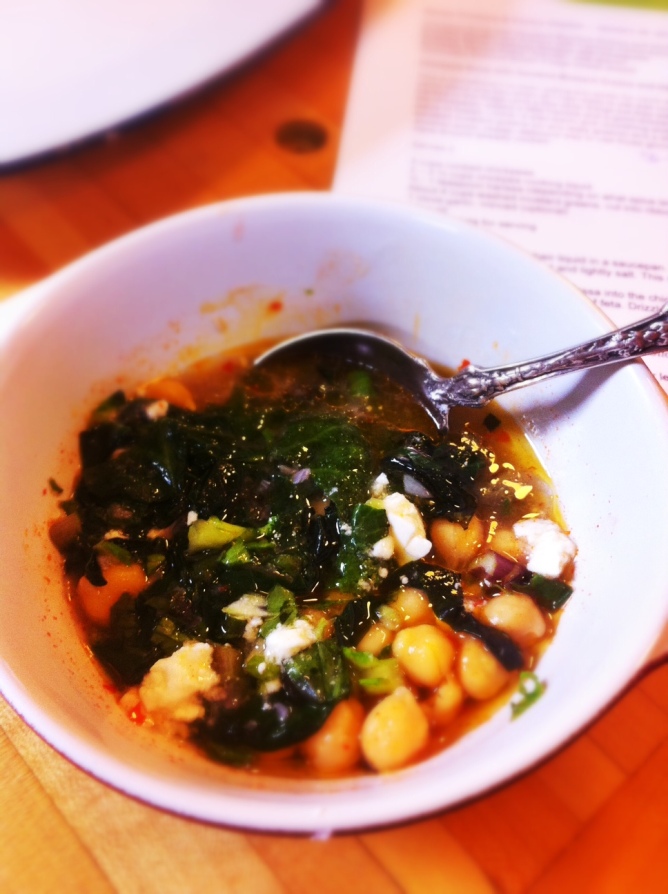
Chickpea Soup with Sautéed Mustard Greens and Harissa

This is something I’ve been eating this winter for lunch with a variety of toppings or additions. It came about one day when all I had ready to eat was cooked chickpeas in their broth, a jar of Harissa in the fridge (and a few other things but they were not suitable for lunch). I heated up the chickpeas, added a little Harissa and a good drizzle of olive oil and lunch was had, with a piece of bread, I think. It was warm and nourishing and lovely. I like the addition of quickly sautéed mustard greens (or any leafy greens) and a little feta. This is just a basic template and another quick, cheap, delicious way to use those glorious chickpeas or any kind of bean you have around already cooked.

Serves 2

3 cups cooked chickpeas (or other beans of your choice)
2 – 2 ½ cups chickpea cooking liquid
½ – 1 teaspoon Harissa (depending on what spice level you like and your brand of Harissa)
About 4 cups washed mustard greens, cut into ribbons
1 clove garlic, minced (optional)
Olive oil
Crumbled feta for serving
Salt and Pepper

Heat the chickpeas and their liquid in a saucepan. Sauté the mustard greens with the garlic in a bit of olive oil until just wilted and lightly salt. This should only take about 3-5 minutes.

When ready to serve, stir the Harissa into the chickpeas and portion the soup into bowls. Top with the mustard greens and a bit of feta. Drizzle on a little more good olive oil and grind of pepper and enjoy!

Chickpeas and Harissa topped with mustard greens and feta

Chickpeas and Harissa topped with mustard greens and feta (photo courtesy of Mark Timby)

When Time is Short – Chickpea Avocado Salad Sandwich

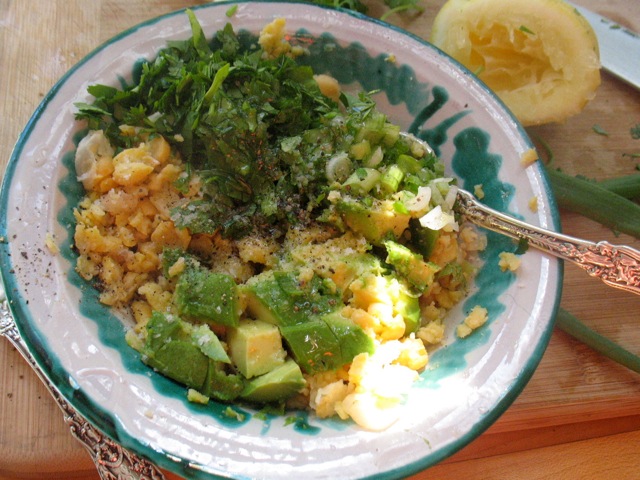
Cooked chickpeas are mashed together with avocado, cilantro, green onion and lots of lemon juice. Eat by the spoonful, on/between toasted bread, in a tortilla, as a dip. . . .you get the point. It’s delicious and versatile.

Time has been short for my lately, hence my long absence here. I’ve been consumed with all sorts of projects and I have missed this place. So, hello again!

These busy weeks have had a few silver linings, one of which was that I was probably living more like many of my students (and possibly readers) who have far less time than me to spend in the kitchen and less time thinking about what to make for ourselves and our families on a daily basis. And thus I have gained a bit of perspective and have some new ideas about how to eat well and with minimal stress (and minimal processed food) in times of heavy workloads.

Yesterday I taught a class as part of the Wellness Program for county employees. Many of them work 10-hour days and getting a healthy, delicious meal on the table is really a stretch. I taught three things (a frittata with snap peas, herbs and feta; an arugula, white bean and tuna salad, and this chickpea avocado dish). They were all devoured but this one was met with the most initial skepticism and then maybe loved the most–for its adaptability, speed, and flavor. I also love this dish because it uses herbs in great, heaping quantities. I’m teaching an herb class in July because I’m almost as much of an herb evangelist as I am a bean evangelist.

If you have pre-cooked chickpeas on hand (or you can use canned ones after rinsing well) this comes together in minutes.

I got the idea for this salad/spread/dip here and have since made it with mint instead of cilantro, green garlic instead of green onions, cumin and smoked paprika, and Serrano chilies and lime juice instead of lemon. You can mash it really well for an almost hummus like consistency or leave it chunky. You can thin it down with more bean cooking liquid, water or more juice and olive oil. You can make a big batch and have it for lunch several times in a row. . . .In other words, it’s a perfect cook-with-what-you-have/like candidate.

You can just gently mix all ingredients or mash them together well for completely different consistencies.

Chickpea and Avocado Salad/Sandwich
–inspired by twopeasandapod.com

This is delicious as a dip, on toasted bread, as a sandwich filling or just as is. You can adapt this in many ways too—add your favorite hot chilies or hot sauce, different spices or herbs, etc. See more ideas for variations above. I particularly like using mint or basil or a combination. Tarragon and chives are good and so is parsley.

1 1/2 cups cooked chickpeas
2 greens onions (scallions), thinly sliced
1 small or ½ a large, ripe avocado
1/3 cup (or more) chopped cilantro (stems and all)
Juice of half a lemon or lime (or more to taste)
Splash of good olive oil
Salt and pepper to taste

Mash the chickpeas in a bowl, add all the remaining ingredients and mash some more and mix well. If you want to serve it more like a salad or side, just lightly mash the chickpeas and dice the avocado and mix everything together more gently. You don’t need to achieve such a uniform texture in that case.

Cleaning out the Freezer & Cornbread

We ate the last quart of frozen berries about six weeks ago and freezer pickings are starting to get a bit slim, as they should be. I am equally as keen on filling that freezer in summer and fall as am to emptying it by late May when the berries in Oregon start arriving. I’ve gotten better at managing quantities of things to freeze based on my families likes and dislikes, my style of cooking and what holds up best in this format. The only thing I miscalculated this year was on roasted Anaheim chilies. I still have a LOT of those left. It may be they are a bit too spicy for my five-year-old or that I just haven’t remembered them at the right time when I was making chili or some other suitable dish. So this week I will be dicing them and adding them to cornbread (recipe below) and savory bread pudding and rice and anything else I can think of.  If you have favorite ways to use these Anaheims or some roasted Poblano chilies please share!

Roasted chilies, tomato jam, pesto, applesauce and roasted tomatoes.

I managed the quantity of my frozen, roasted tomatoes well this year since with our cool, wet spring we won’t be seeing tomatoes in the market for a good while. I have enough for a few more sauces or soup bases and for quesadillas and sandwiches.

As I canvas the nearly empty freezer I am reminded of the privilege of “going shopping” in the basement freezer and how that one last jar of pesto will mean dinner can be on the table in 15 minutes or that tomato jam that’s a little spicy, savory and sweet will grace some “Daddy Patties” or a hamburger next week. All that incremental work of stocking in small batches as I have extra in the peak of the season is rewarded over and over again.

I have gotten better at labeling frozen items over the years, though last week, a container marked rhubarb compote, that I had been saving for dessert for a recent cooking class turned out to be cooked Pinto beans. So while the freezer has turned up a few surprises like that its contents have mostly served as constant inspiration, reminder of summer flavors, and in-house grocery store.

And this time of year, as the new growth of spring gains traction I will start “shopping” more in the backyard for things like this, that pair nicely with the dregs of the freezer.

Lettuce, arugula thinnings, parsley, chives, mint, and carrots.

Chili and Cheese Cornbread Muffins
–adapted from Fields of Plenty by Michael Ableman

I make this for dinner regularly. It’s very quick and nothing beats warm cornbread for dinner. It’s really best within a few hours of baking but it never lasts long around here. This version has chopped, roasted chilies, sharp cheddar and black pepper in it. However, if you omit those, you get the plain, traditional one I love too and typically make in a cast iron pan. You can certainly make this version in a cast iron pan too and skip the muffin tin.

5 1/2 tablespoons butter, divided
1 ½ cups cornmeal (I use a fairly course/polenta grind but medium grind is fine too)
½ cup all-purpose flour
1 tablespoon sugar
2 ½ teaspoons baking powder
1 teaspoon kosher salt
freshly ground black pepper
1/4 – 1/3 cup chopped, roasted Anaheim or Poblano chilies
3/4 cup grated sharp cheddar cheese
pinch or two of cayenne (optional)
1 egg
1 ¼ cups milk (preferably whole)

Preheat oven to 400 degrees.
Melt 4 tablespoons of butter and let cool slightly. Combine cornmeal, flour, baking, powder, salt, pepper and cayenne (if using) and sugar in a medium bowl. Whisk the egg and milk together in a small bowl. Add melted butter and milk mixture to dry ingredients along with cheese and chilies and stir quickly. Do not over mix.

If you’re making muffins, brush the tin with melted butter (the remaining 1 1/2 tablespoons) and fill the cups 3/4 full and bake for 10-12 minutes or until a toothpick comes out clean. You really don’t want to overbake these.  Or heat a 9 or 10-inch cast iron frying pan over med-high heat. Add the remaining 1 ½ Tbs butter to the pan. When the butter is melted and foaming pour the batter into the skillet. Bake until the corn bread is golden and a knife inserted in the middle comes out clean, between 15 and 18 min. Serve hot out of the oven.

Corn muffins with roasted chilies and cheddar.


Salad

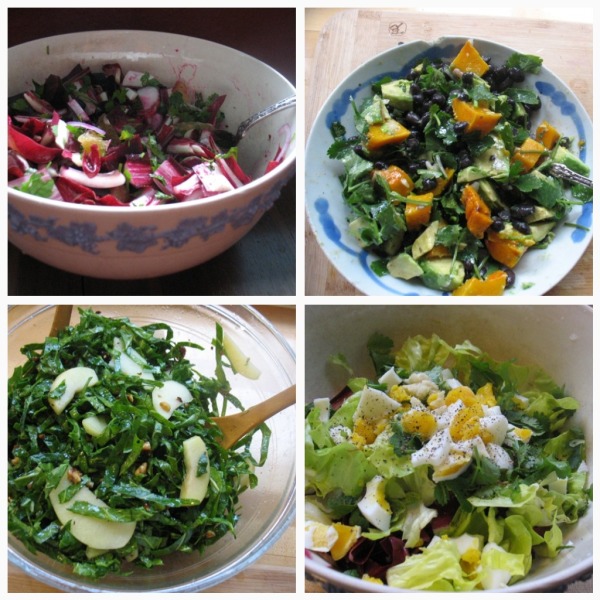
From top left: beet, orange and radicchio salad; roasted squash, black bean, avocado and cilantro salad; raw collards with pickled apples and toasted walnuts; and mixed salad with chopped egg.

I got to have lunch with my mother today. You’ve heard about her many times here but not lately. I was standing at the counter in the kitchen this morning mixing yogurt into my muesli with fruit and granola and I had one of those moments where you catch yourself, you recognize yourself in someone else. You realize how fundamentally you’ve been shaped by someone else, you have similar reactions, tastes, expressions. . . . It made me smile, feel old and all-grown-up and quite comfortable actually.

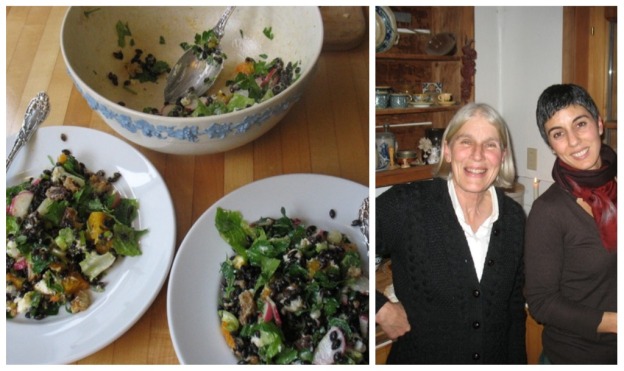
And then she came by for a quick lunch today. As per usual I tossed together whatever I had on hand to make a hearty salad. Today that was already cooked barley (Jet Barley) and already roasted squash. I had a few radishes, a lone scallion, some goat cheese (leftover from Saturday’s Improv class), a handful of parsley, a few leaves of romaine, and one puny slice of bread which I toasted and then tore up in to tiny bits. This all sounds rather odd but dressed up with a nice vinaigrette enlivened with my apple cider syrup it was just right–chewy, fresh, and rich from the squash and cheese.

Barley, radish, parsley and squash salad and my lovely mother and me.

I’m not suggesting you recreate this particular mix. What I do suggest–surprise, surprise (!)–is that you have cooked beans or grains or roasted or fresh veggies on hand so that tossing something like this together is a snap. My mother often does this and I remember her doing this especially when my father was away for work. Meals got simpler, less conventional (though she was never terribly conventional!).

This winter I’ve been making random concoctions like this a lot and I’m getting better at them, with the exception of the one with grated rutabaga (which can be very good in salads), roasted beets, and radicchio. It’s fun to balance textures and flavors and create such colorful one-bowl meals with odds and ends. And I continue to be inspired by Plenty (the beet salad above, for instance) though I rarely have all the ingredients Yotam Ottolenghi calls for but his combinations are so brilliant and they’ve been adapting well.

I realize I’m not giving you a precise recipe but you might not need one. Just think of your salad bowl and the contents of your pantry and fridge as your inspiration. Make a zippy dressing of some kind and see what happens. And if that seems too vague or scary and you happen to live in the  Portland, OR area then come to the upcoming Pantry & Quick Meals or Kitchen Confidence (techniques, substitutions, etc. ) or Salad classes!

Happy Cooking and Eating!

Apple Cider Syrup

Apple cider cooked down to a syrup. Spectacular in salad dressings, cocktails, etc.

I have a few aces in my cooking repertoire, not that many, but a few. And this one is probably at the top of the list. Like most things I cook and teach it’s pretty straightforward, laughably simple actually. It came about a few years ago when I had lots of apple cider left over from my family’s cider pressing party. So I decided to reduce about a gallon of the cider until it just got syrupy which took my gallon down to about a pint. (If you reduce a bit too far, add some cream and a little salt for the most divine apple cider caramel sauce!)

I started using a teaspoon or two in salad dressings and I was hooked. The stronger winter greens this time of year are perfectly complemented by this “mystery” ingredient in the dressing. Countless times people have asked me what was in my salad dressing and a friend now can’t make big enough salads since her 8-year-old eats practically the whole bowl. I have to admit this has not worked with  my 4-year-old  . . ..

This syrup also inspired the Party Class I co-taught with cocktail wizard Scott Taylor this last weekend. He encountered the syrup in a Beans Class  (that by the way I’m teaching again with new recipes January 7th) earlier this fall and immediately went home and started mixing drinks with it. It is a winner mixed with bourbon, ginger syrup, bitters and lemon!

Cider syrup over Greek yogurt.

Beyond salads and cocktails the syrup is wonderful over ice cream or Greek yogurt, drizzled onto soups or braises or roasted vegetables or fruits, on pancakes or waffles. . .. It’s sweet and tart and complex and contributes almost anywhere. So go buy a couple of gallons of apple cider, reduce it and give your friends who like to cook and drink a little jar or it as a gift. Or just make a bunch and freeze some. It also keeps well in the fridge for several months.

And speaking of gifts, you might also give the gift of a cooking class (to yourself or others) this season– a gift that doesn’t clutter anyone’s home yet makes a daily difference for the tummy!

Apple Cider Syrup

1 gallon apple cider (not apple juice)

In a large pot or saucepan bring the cider to a boil. Let boil, uncovered until gallon has reduced to approximately two cups of syrup and consistency is thick enough to coat the back of a spoon. This can take anywhere from 40 to 90  minutes depending on the size of your pan, the strength of your stove, etc. Refrigerate or freeze when cool.

Perfect Green Beans

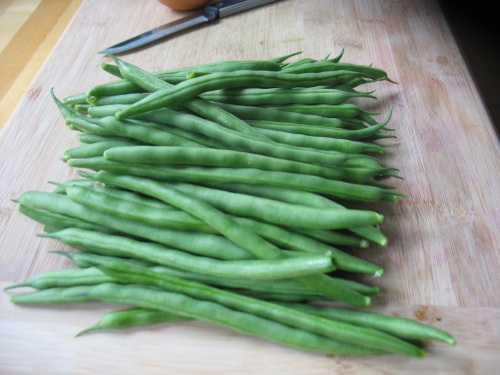
Green beans (Kentucky Blue) from my garden.

I have a small garden with only a few places with really good, sunny exposure. I sow green pole beans every spring in one of those sunny places and every year I’m taken aback by how delicious they are. Once they start producing I pick them twice a day–first thing in the morning and just before it’s too dark to see. I only have about seven plants that have wound their way up their strings along my fence but I managed to pick about a pound over a four-day period.

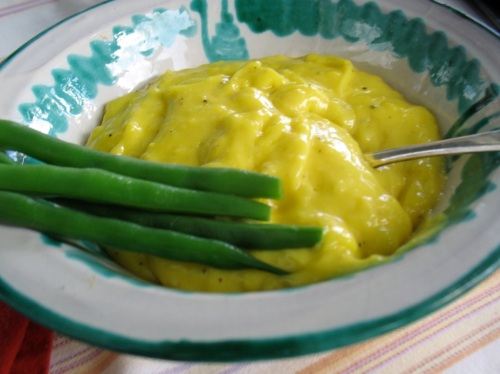
Aioli with green beans.

My favorite thing to do with these tender things is to make aioli (garlicky mayonnaise) and dip the perfectly cooked beans (by which I mean four minutes in salty, rapidly bowling water) into the aioli. I ate three-quarters of a pound of the  beans pictured above in a single sitting Sunday noon. My boys got a few but they don’t rhapsodize about them quite like I do so everyone was happy.

I know I’ve written about aioli here before but here are some photos to go with it.

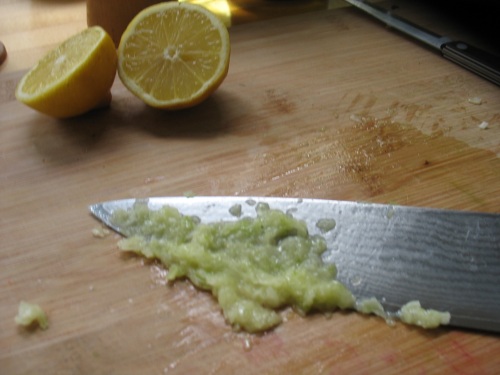
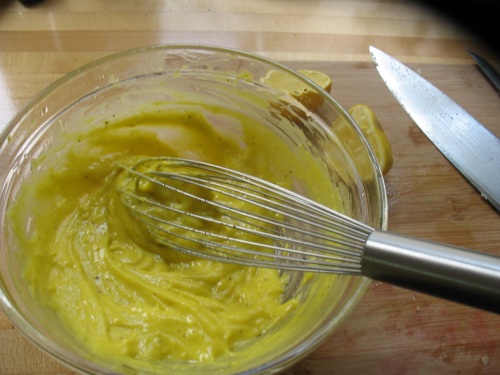
2 beautiful yolks, 2 cloves of garlic (much less than is traditional but I like a slightly milder aioli), and fresh lemon juice--the foundation for aioli.

You can use a mortar and pestle to mash the garlic with some coarse salt (gives it the texture you need to mash it well) or just do it on a cutting board with the side of a chef's knife as I've done here. Just chop the garlic cloves first, sprinkle generously with coarse salt and then lay the side of the knife on top of the garlic, push down and pull the knife (dull side) toward you. Repeat until you have a nice paste. It takes a little practice but once you have it down it's a quick way to get a good, homogenous paste.

The finished product. I added about 1/2 cup of good olive oil (drip by drip at first and then in a thin stream) and then about 1/3 of a cup of sunflower oil.

Sunday's lunch: beans and aioli, leftover rice with leftover salsa verde.

Aioli 

2 egg yolks (preferably organic)

2 medium/large cloves  garlic (or more if you like it stronger)

lemon juice (1/2 to a whole lemon’s worth depending on your taste)

coarse fleur de sel (or any good sea salt)

freshly ground pepper

1/2 – 3/4 cup good-tasting olive oil

1/3 cup neutral oil like sunflower

Mash garlic to a paste with salt (either in mortar and pestle or with a knife –see note above). Put garlic in a medium-sized bowl. Add the egg yolks and 2-3 teaspoons of lemon juice and some black pepper. Whisk well. Then start adding the olive oil drip by drip or in a very thin stream at first. You’ll need to incorporate about 1/4 cup of oil like this before you can safely speed things up. This is the most important step in ensuring that it properly emulsifies and doesn’t break. Incorporate the rest of the olive oil and neutral tasting oil (it can get too bitter if you use just olive oil, though this is a non-traditional approach but one I like) and adjust seasoning with more lemon and/or salt.

Happy Cooking and Eating!

P.S. I’ve posted fall classes. . . .Late Summer Bounty, Beans, Pies, Soups, Eat Better Series. . . .a little something for everyone I hope!

Summer (Cherries, Green Couscous, Garlic Scapes)

Dessert in a tree.

My four-year-old son Ellis and I spent a night at my mother’s place last week.  She lives in the middle of nowhere and has neighbors with cherry trees and fruit picking ladders. Ellis climbed right to the top of this rather tall ladder and ate his fill of Royal Ann cherries, gleefully spitting the pits down onto our heads. Actually he mostly missed our heads but cackled with each dropping pit. The setting sun and a sticky, happy kid . . .. Summer, finally here (though absent again today) is so wonderful. And if you have lots of cherries and need a new idea for them, try this wonderful recipe by David Lebovitz for Cherries in Red Wine Syrup.

My cooking has been somewhat sporadic and a bit frenetic of late. We’ve been out-of-town, had visitors, had lots of picnics and barbeques, even a meal or two out. I want to be outside all the time and am spending more time processing berries than making dinner. This means we’ve had a lot of frittatas, salads and artichokes for dinner lately or anything else I can throw together in minutes so I can get back outside.

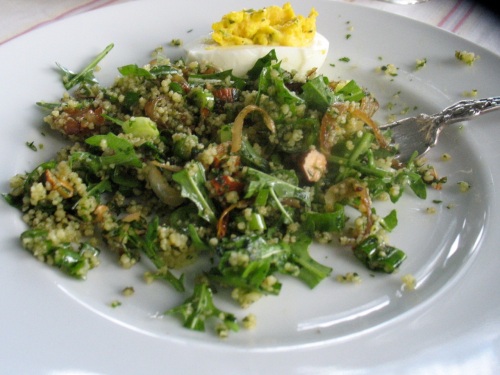
Green Couscous from Plenty by Yotam Ottolenghi

I have made two dishes worth noting in the last few days. The first comes from one of my favorite cookbooks Plenty by Yotam Ottolenghi that you’ve  heard me rave about here before. It’s called Green Couscous and is a herb-heavy, full flavored dish. If you, or you in combination with your neighbors grow mint, cilantro, tarragon, dill, parsley, and arugula, you might be able to make this salad on a moments notice. The recipe calls for toasted pistachios but I didn’t have any and substituted toasted almonds which worked beautifully. This recipe is not super quick. It has a few more steps than most of my dishes but it’s well worth it.

I know our spring here in the Pacific Northwest was cooler and wetter than others so if you no longer have garlic scapes (tops, whistles) in your neck of the woods just file this away for next year. Garlic scapes are the long, elegant stalks that grow up out of a garlic plant. So while the head of garlic is finishing up its growth underground the plant gives us a fragrant, sweet, tender shoot to work with as well. These scapes make a wonderful pesto so if you have some in your garden or see a bunch at the farmers market or in your CSA box, this is one thing to do with it.

Garlic Scape Pesto. Next to the bowl of pesto you see the very tops of the garlic scapes which hold the flower of the plant. You want to use the scape right up to this part but I typically don't include the immature flower in the pesto but come to think of it I'm not sure why. . . .

Garlic Scape Pesto

1 bunch (about 7-8) garlic scapes

generous handful of toasted (or raw) walnuts

1-2 ounces parmesan or Asiago stella

3/4 cup (or more) basil leaves

1/3 cups of good-tasting extra virgin olive oil

salt, pepper

Roughly chop the garlic scapes, with our without the very top, flower part (See note in caption above). Process the nuts and cheese in a food processor. Add the remaining ingredients and process until smooth. Adjust seasoning to taste. Serve on toasted bread, with pasta, potatoes, eggs dishes other grains. . . .

Happy Cooking and Eating!

P.S. Two spots left in my August Eat Better Series. Save money, eat well, fewer trips to the store and more fun in the kitchen . . .

Artichokes

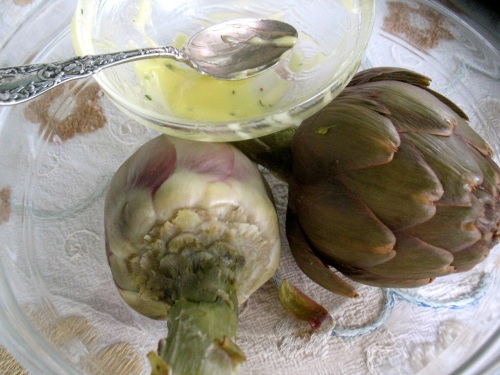
What was left of five artichokes the three of us had for dinner last night.

There were two things I remember eating in great quantity as a child (actually I’m sure there were many more than two) artichokes and corn on the cob. I think my artichoke record was four in one sitting and eight ears of corn. The corn was always homegrown and the ears weren’t usually quite as large as store-bought ones but still, I loved these two things. I have a feeling my four-year-old is going to give me a run for my money on the artichoke front soon. I certainly can’t put away four in one sitting anymore. And he ate one and a half artichokes last night and they were big.

For inexplicable reasons we haven’t eaten many artichokes for a few years but somehow this year the bug is back and I’m buying them at every turn. The ones pictured above are from a local farm (DeNoble Farm in Tillamook, OR) and are available at the Portland Farmers Market on Saturdays.

Growing up my mother boiled them and we dipped the leaves and much-anticipated heart in regular store-bought mayo and I loved them that way. Then I spent a lot of time in Italy and learned of the dozens of other ways of preparing them, all of which I loved as well. Most of those preparations–stuffed, grilled, roasted, in a ragout, in a frittata, etc.–are a bit more time-consuming so this spring I’ve mostly been doing it the good old American way.  I made them for my in-laws in Colorado 10 days ago and it turned out to be the first artichoke my father-in-law had ever had and he loved it.

For last night’s I used a bit of leftover aioli (with chives and thyme) and stretched that with the store-bought stuff and it was perfect.

I was much too excited to start eating to remember to take any photos of the original, beautiful bowl of five whole artichokes so all you get is the dregs that I promised I'd save for Ellis for dinner tonight.

So, if you want a low fuss summer meal, pick up a bunch of artichokes; get out big bowls for the leaves and thistle parts and a bowl of mayo, homemade or not and go to town.

P.S. I know it’s more common to steam artichokes but I’ve always just boiled them, water coming about half way up the artichokes (stem end down) for about 45 minutes to an hour (depending on size they might take longer). You want the stem and heart to be very tender when pierced with the tip of a knife or fork. When tender I hold them upside down by their stems to drain them well and then they are ready to eat. I’ve always assumed boiling was faster than steaming and I always seem to be in a hurry but by all means steam them if you prefer.

Fava Beans and Cookbook Winner(s)

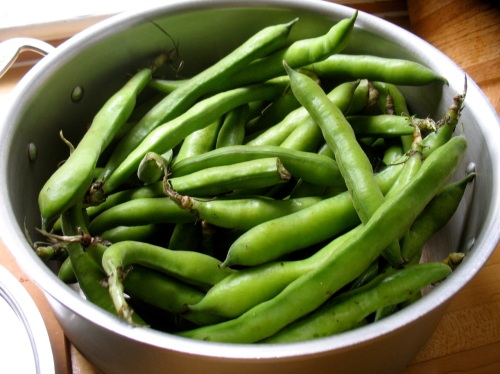
From the bag into the pot! No washing, no shelling, no nothin'!

I just realized that last week I posted basically the same recipe I had posted a year earlier (even using the same photo!!!!) and that my plan for today’s post was to link back to a post I swore I wrote last year about this short-cut way of cooking fava beans . . . but alas that post seems only to have been imagined!

I’m writing two posts this week because I’ll be out-of-town and on vacation next week. Appears I really need that vacation . . .

Anyway, I learned how to cook fava beans like this from my friend Carol (of Ayers Creek Farm fame). Favas are a spring treat in our region and are only in the markets for a few weeks. They are often overlooked because most preparations have you shell them, then cook the beans and then peel each individual bean. And while the result is definitely worth it, it is a more labor intensive and time-consuming process than most veggies require. So since I learned the below method I enjoy far more favas each year than I used to.

You literally cook the favas, big squishy pods and all in a large pot of heavily salted water until the individual beans start following out of the pods and then you don’t peel the individual beans. So if you like fava beans and wish you used them more, make this and report back. Curious to hear if you love it as much as I do.

Now to the cookbook giveaway winners. I had to choose two of you since there were just so many lovely comments. So, as randomly chosen as possible (having my four-year old pick two numbers): Ginna and Quisicosa will receive the Grand Central Baking Book. Please email me your addresses and I’ll send you your books. Thanks to the rest of you for your lovely comments and I’ll do another one of these sometimes soon.

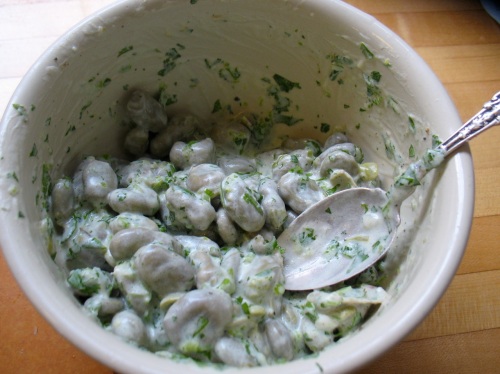
Fava beans dressed with yogurt, cilantro, lemon juice and zest and garlic

Fava Beans with Cilantro, Yogurt and Lemon

Carol Boutard of Ayers Creek Farm told me about this method of cooking fava beans which eliminates the time consuming step of peeling each individual bean. This is an Iranian way of cooking favas.

2 pounds fava beans in their pods

¼ cup kosher salt

1/3 cup Greek yogurt or plain, whole milk yogurt (or more if you want it saucier)

1/3 – 1/2 cup finely chopped cilantro (can use a few tablespoons of chopped mint instead)

1 -2 teaspoons lemon juice (to taste)

zest of one lemon, finely grated

1 medium clove garlic, minced (or 1 stalk green garlic, minced)

1 tablespoons olive oil

salt & freshly ground black pepper to taste

Place your whole fava bean pods in a six-quart pot (or slightly larger). Fill the pot three-quarters full of water or until the favas are just covered. Add the salt (it seems like a crazy amount of salt but I promise it turns out just fine) and bring to a boil. Reduce the heat so the water stays at a rapid simmer and cook covered, until the pods start falling apart, between 20 and 30 minutes. Drain and fill pot of beans with cold water. This allows you to extract the beans more quickly. You can also just drain and let sit until cool. Remove beans from pods. There is no need to peel each individual bean. The skin should be tender and the beans perfectly seasoned. Toss beans with the remaining ingredients. Adjust seasoning to your liking. Enjoy as a side dish or on crusty bread or tossed with cold pasta for a hearty salad.

Fava beans cooked this way (and without the dressing) are delicious with pasta and a bit of parmesan, with boiled potatoes and parsley. I’ve added them to Israeli couscous with some mint and grated, hard cheese (Asiago Stella, I think).

Class Update: It’s getting down to the wire for signing up for the two remaining June Cooking Classes. One or two spots left in each–lunchtime and improv!