Skip to content

Posts from the ‘Desserts’ Category

Zwetschgendatschi

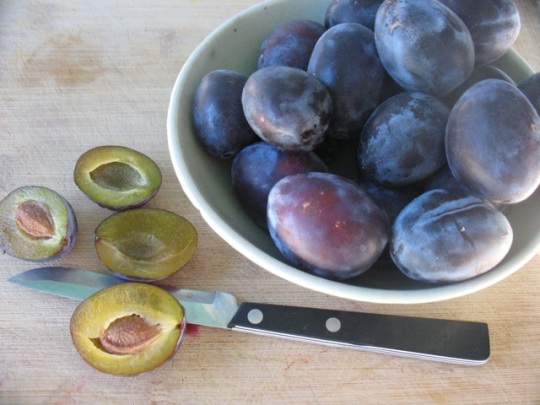
Italian Prunes make this simple tart so delicious and there is a short season for these so take advantage if you can find some.

There are many versions of this Bavarian dessert and many of them use a yeasted cake as the base. I grew up with a butter heavy, short crust version and am thus devoted to it. You want Italian Prunes since they have the acidity and complexity that makes this simplest of all desserts so incredibly good. Italian Prunes are sometimes called Prune Plums or just Italian Plums. I know over the years growers and marketers alike began avoiding the word prune and conflating it with a dried prune but I cling to what I think of as the real name!

My home state of Oregon used to be a very large producer of this wonderful fruit, delicious both fresh and dried. Many of the orchards have been taken out over the years, often to make room for vineyards which admittedly produce a sexier crop. These prunes are the epitome of late summer to me and my mother brought me a big bag of them and I couldn’t resist pulling out her recipe and making this childhood favorite. And while there are  many variations of this cake, they are ALL (in Germany at least) served with lightly sweetened whipped cream so please don’t skip that, unless you’re having it for breakfast, and even so it wouldn’t be a bad  idea.

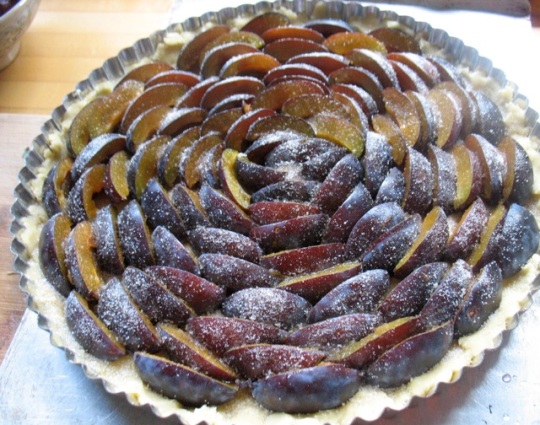
When cooked, the prunes take on a lovely pink hue and the dusting of cinnamon and sugar just barely caramelizes the fruit.

Zwetschgendatschi (Prune Tart)

Makes one 10-inch tart

For the crust:

10 tablespoons unsalted butter (at room temperature if you remember–cold butter will just make you a work a bit harder:)
scant 1/4 cup sugar
1 3/4 cups all-purpose flour (you may need a bit more to bring the dough together depending on if you use one whole egg or just the yolk)
1 small egg (or the yolk of a large egg)
Pinch of salt

For the topping:

About 2 lbs of prunes (you may only need about 1 1/2 lbs but it depends upon how tightly you want to pack them onto the crust)
2 tablespoons sugar
1/2 teaspoon cinnamon

Lightly sweetened whipped cream for serving

Preheat Oven to 375 degrees F.

Cream the butter with the sugar until just mixed. I know it seems silly to try to split one egg in half but it’s possible so do that or just use the yolk of a large egg. Or if you  happen to have a very small egg use the whole thing. It doesn’t really matter so much how you do this. You can always add a bit more flour if the dough is too sticky. The original recipe is double the above quantities with one whole large egg. It makes a lot of dough which is why I halved it since it fits perfectly into a 10-inch tart pan. Feel free to double it and make a larger version of the tart or save half the dough for something else. When the egg has been incorporated mix in the flour and salt. Use either a wooden spoon or your hands. Work the dough until it’s nice and cohesive. It may be a bit sticky so just add a bit of flour.

Pat the dough evenly into a 10-inch tart pan with the palm of your hand. You want to bring the dough up the sides just by 1/3 -inch or so. If you don’t have such a pan you can also press it into an 8″ x 13″ pan. If you are using a 10-inch tart pan you may have a little excess dough with which to make a little mini tart as happened to me on my second batch recently.

Now cut the prunes into quarters and arrange them tightly in circles, starting from the outside and moving inward. If you’re using a rectangular pan arrange them in rows instead. The fruit will shrink so pack them in well, pressing down just a little. When you’ve covered the dough mix the cinnamon and sugar together and sprinkle evenly over the fruit.

Bake in the lower half of the oven for about 35 – 45 minutes until the fruit has released some juice and is bubbling a bit and the edge of the crust is golden brown. Let cool to room temperature and enjoy with lots of whipped cream.

I like this tart both on the first day and on the second, when the crust softens a bit and absorbs the juice.

Ready to go in the oven.

Enjoy these heartbreakingly beautiful days with so much bounty to cook and preserve and eat!
Labor of Love . . . in the Form of Currant Cake

Currant Cake (Johannisbeerkuchen) fresh from the oven.

My father was German and as might be considered typical, had strong opinions about many things, including food. He had an excellent palate. He died sixteen years ago when I was 23,  long before I devoted my professional and volunteer life to food. I would love to talk to him about my current adventures and I’m sure he’d endorse some and be critical of others. He did, however, shape my palate and likes (mostly) in many ways. Like him I love apricots, currants, raspberries, whipped cream, dark rye bread, orange marmalade, wine, and many other things. He also really enjoyed food and was therefore usually fun to cook for. My American mother was/is the cook in the family but our many years living in Germany shaped the way she and now I, cook.

My father loved red currants (Johannisbeeren) and they ripen right around his birthday, July 17. This Johannisbeerkuchen, currant cake, was his preferred birthday cake and my mother has made it every year since his death. I’m a few days early, but my neighbors’ currants were ripe, so I made it today. It’s the first time I’ve ever made this cake in fact. It’s a classic German cake in a several ways–not terribly sweet, employs lots of ground nuts, and is encased in a buttery short crust. It is a bit more labor intensive than some but if you like currants or think you might and have been looking for a way to use some, give it a try.

The shortcrust recipe makes more than you’ll need for the 10-inch spring form. You can make a few mini tarts with the remainder or freeze or refrigerate for later use.

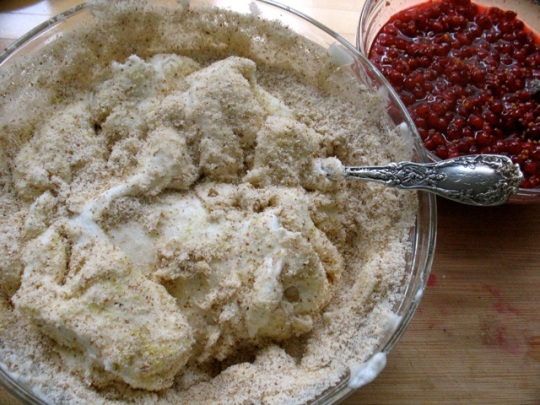
You gently fold the ground nuts (hazelnuts or almonds) and grated lemon zest into the meringue before folding in the currants.

Currants have now been folded into the meringue. A bonus of making this cake is she sheer beauty of the process.

Currant Cake (aka Johannisbeerkuchen)

We’ve only ever made this with red currants. If you have pink or white ones I think you can substitute them. I love black currants but they are muskier and just have quite a different flavor. It may well be delicious but it will be a bit different. I’m sure it would be beautiful with a mixture too.

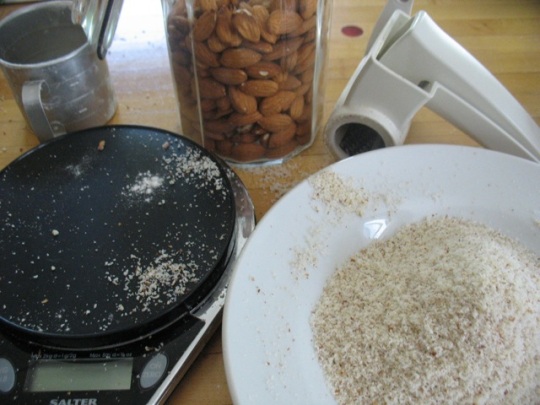
This recipe calls for a lot of ground hazelnuts (or almonds). I grind my own in a little Zyliss grater, see photo below. This creates a very, fluffy light nut flour/meal. You will not get the same consistency if you grind them in a food processor. You’ll get a coarser texture which then easily turns into nut butter. So I would recommend hand grinding them if you have such a grater (many people have them for Parmesan) or buying the nut meal. Bob’s Red Mill carries almond meal that would be fine. It is a bit of work to grind by hand, but as I said, this cake is a labor of love!

You’re going to have six egg yolks left over. I will be making ice cream with mine. . . .

Crust:

2 stick (230 grams) butter, softened at room temperature
1/3 cup granulated sugar
1 large egg
3 cups plus 2 tablespoons all-purpose flour
1/4 teaspoon salt

Preheat oven to 375 degrees.

Cream the butter with the sugar until well mixed. Add the egg and incorporate well and then add the flour and salt. The dough should come together quite easily. I use my hands to do so. It  may be a bit too sticky to handle so flour your hands a bit and gather it into a ball. You won’t need all of the dough (see photo above) so break off a piece to save. Then press the dough evenly into a 10″ springform pan (or deep dish 12″ pie pan) bringing the dough up the sides about 2 inches. Blind bake the crust for about 15 minutes until it’s partially baked and just turning golden around the edge. I just press a round, buttered piece of aluminum foil onto the bottom of the crust before pre-baking to help hold its shape.

Filling:
Four generous cups of stemmed red currants
1 1/2 cups sugar, divided
175 grams, finely ground hazelnuts or almonds (see head note) (about 2 cups of whole, raw almonds turned into 175 grams of ground nuts for me)
6 large egg whites
zest of 1 small lemon

Mix the currants with 3/4 cup sugar in a bowl and let sit while you prepare the meringue. Beet the egg whites until they hold soft peaks and then gradually beat in the sugar.  Then gently fold in the lemon zest and ground nuts until fairly well incorporated. Finally pour in the currants and fold those in as well. Don’t over mix as the currants do not need to be uniformly mixed in.

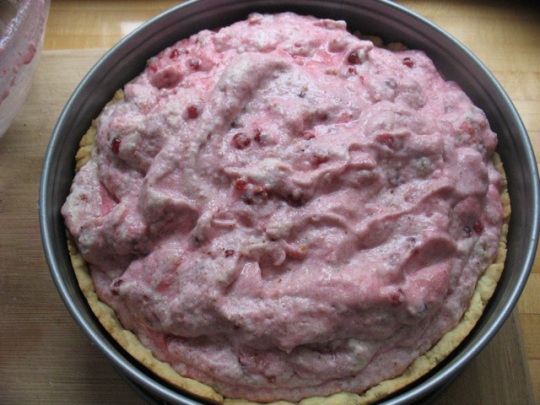
Fill the pre-baked shell with the meringue. It will be quite full but should hold it just barely.

Turn the oven down to 350 and bake the cake for 45 – 60 minutes until golden brown and pretty much set. You’ll still get a tiny bit of jiggle when you tap the side but it will firm up just a bit as it cools. Let cool completely and then cut into thin slices and enjoy!


Ready to go in the oven.

So many German desserts call for ground nuts. I use my little Zyliss grater for this purpose which results in a fluffy, light nut meal. The food processor does not produce the same results so either buy almond meal or grind your own–it’s a bit labor intensive but completely worth it.

Why Do You Cook?

I spend a lot of time talking to folks about what prevents them from cooking. . . the many barriers, challenges, hurdles folks  face daily. But since my goal in life  is to have cooking be a regular, rewarding, fun and creative part of people’s lives, I think a better question to you, all of you, might be why DO you cook?

It’s a similar shift my brother has applied to  his study of home energy use. People always study the homes that waste a lot but no one seems to think of studying the folks who use very little. So, study/talk to those who are already doing it and see what we can learn to help the rest of us along.

So, why do you cook? Please comment below.

As for me . . .

Sometimes I cook because it’s a way to get a break from my tired and cranky five-year-old. . . .if my hubby is home or I can get him, the 5-year-old, to play by himself.

Sometimes I cook so I can cook with my five-year-old.

Sometimes I cook because a once-lovely bunch of kale is about to go bad and I’ll feel guilty if I don’t use it up.

I cook so that I can justify my baking habit (to myself).

Sometimes I cook because I love the challenge of making something with seemingly nothing and feeding the family on it well without spending much of anything.

Usually I cook because we need to eat, of course, but even though I may not want to, the process usually expels any crankiness I started with.

Sometimes I cook because the pot of mint that seems to be growing by the hour in my backyard inspires me to use up that bedraggled half of a cabbage in the vegetable bin in the form of a slaw.

Sometimes I cook because I need a gift for someone.

I cook because I like to garden and I like to garden because I love to cook!

I cook because it makes me feel useful.

And regarding that point about cooking so I can justify all my baking. .. recipes like this are exactly why!

And regarding that point about loving to cook. . . here you can watch me making one of my favorite weeknight,  kid-friendly and crowd pleasing dishes; part of new project called Food Farmer Earth.

Happy May and happy cooking!

Winter Squash Coconut Muffins

Winter Squash and Coconut Muffins

One of my favorite things to do with winter vegetables like beets and winter squash–both of which take a while to roast–is to roast big panfuls to have on hand for any number of savory or sweet uses. Since the roasting is basically unattended you can do it while you’re in the kitchen making something else for dinner or whenever you happen to be home for a bit or your oven is already on.  It then seems like such a coup to have those sweet, tender chunks of goodness in your fridge whenever you want them. I think of this as another element in my prepared pantry. A term I use to describe all those things (veggie bouillon, cooked, frozen beans, etc.) that enable you to make fast food with real, wonderful ingredients. I think I’ll devote a whole post to this concept one of these days. And as a matter of fact, some of my upcoming classes–Pantry Stocking & Quick Meals and Kitchen Confidence: Techniques &  Tools, Variations & Combinations–focus on just such things.

Sometimes I don’t even manage to make them squash or beets into anything but just snack on them or serve them as a side with good olive oil and salt and a drizzle of sherry vinegar for the beets. But often they go into salads or a risotto or soup or curry. The other day I had a bunch of roasted squash in the fridge as well as a partial can of coconut milk which I knew wouldn’t last much longer. So out of these two items these muffins were born.

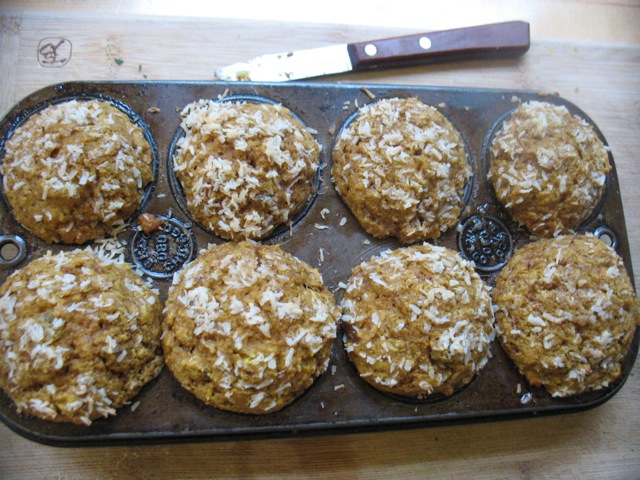
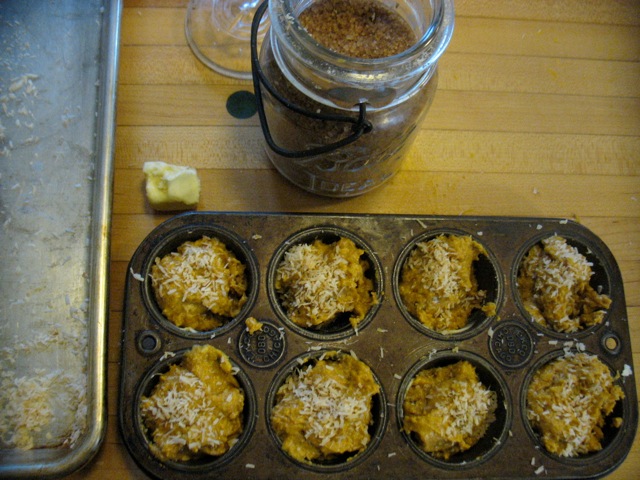
The coarse sugar and toasted coconut make for a nice, crunchy topping. Don't skip this part--it really adds and you use more of the coconut in the batter it anyway.

The bake-with-what-you-have strategy does not always work but this time it did and I will open a new can of coconut milk and roast squash for just this purpose in the future. I added some chopped golden raisins (whole my son picks them out but chopped he doesn’t mind them) for sweetness, a bunch of fresh, grated ginger and some toasted shredded coconut. Next time I’m going to try adding some lime or lemon zest just for fun but there already is plenty going on in these. And in the bake-with-what-you-have vein, I’m sure these would be good with nuts instead of raisins or other dried fruit or different sweeteners so play around and let me know how it goes.

These muffins keep quite well since the squash keeps them moist.

Winter Squash Coconut Muffins

These muffins are not very sweet so up the sweetener a bit if you’d like. And the sweetness will also depend on the kind of squash you use. I used buttercup and would recommend it, kabocha, hubbard or butternut. You want a dense, dry-ish fleshed, sweet squash. But then again, use whatever you have and see how it goes!

About 16 – 20 muffins (I made 12 regular sized-ones and 8 smaller ones — see photo)

1 cup all-purpose flour
1 cup whole wheat pastry flour (or spelt flour, etc. )
3/4 cup coconut sugar (or brown or regular granulated sugar)
2 tsp baking powder
1 tsp baking soda
¾  tsp salt kosher salt
1/2 teaspoon ground cinnamon
1 tablespoon freshly grated ginger
Generous 2 cups roasted winter squash
1/2 cup golden raisins (chopped if you have raisin dislikers in your circle)
1/2 cup plus 3 tablespoons unsweetened, shredded coconut lightly toasted, divided (I did this while I was preheating the oven)
1 1/2 cups coconut milk (preferably full fat)
2 eggs
1 tsp vanilla

Topping:
2 tablespoons coarse sugar such as demerara or turbinado
3 tablespoons toasted, shredded coconut (from quantity listed above)

Preheat oven to 375. While it’s heating spread the shredded, unsweetened coconut on a sheet pan and toast until just beginning to turn golden. This can take anywhere from 5- 10 minutes. Check often and be careful not to burn.

Put the squash, eggs, ginger, coconut milk and vanilla in a blender or food processor and process until smooth. Alternatively you can mash the squash with a fork (it should be nice and soft and easy to do) and then whisk all the wet ingredients together by hand.

Whisk the flours, sugar, baking soda, baking powder, cinnamon, and salt together in a large bowl. Add the squash coconut milk mixture, the raisins and toasted coconut (be sure to reserve 3 tablespoons for the topping) and stir until just combined. Don’t over mix.

Portion the batter into muffin tins, filling each one about 3/4 full. Sprinkle each unbaked muffin with the coarse sugar and toasted coconut, lightly pressing down on the topping so it sticks well.

Bake for about 15 – 18 minutes or until a tester comes out clean.

Rice Custard

One of the first things I remember my husband cooking was this rice custard. We have been together 19 years today and I remember him talking to his mom over the phone asking her to track down this recipe that he had made as a kid. The phone conversation resulted in a somewhat terse handwritten version on a scrap of paper that he occasionally unearthed from my overflowing recipe binder over the years. Many years later his mother gave him the old Fannie Farmer Cookbook (1959) where this recipe originated.

Rice Custard from the 1959 The Fannie Farmer Cookbook made by my husband Brian.

This last weekend Brian made the rice custard again, on a lovely lazy Saturday (the first Saturday in a month that I hadn’t taught a class) and we ate rice custard at 4:30pm with the sun shining in the window. Ellis exclaimed gleefully mid-way through his bowl, “we’re having dessert right before dinner!” I spooned the very last of my boozy fruit (mostly cherries preserved in rum that had been “marinating” for 7 months now) over the custard and found the custard to be the perfect foil for it.

So there we were the three of us, eating warm, luscious rice custard on a late afternoon in February almost 20 years since Brian and I first met. As old as I sometimes feel these days, life also just seems to be getting better and better. And food made with love . . . don’t need much more than that.

Rice Custard
 –adapted from The Fannie Farmer Cookbook (1959)

Heat in a double boiler (or any heat proof bowl over a pan of gently boiling water)
2 cups milk
2 generous cups cooked rice (we use white Jasmine but short grain brown or white could work too) from one cup uncooked rice.

Beat until smooth in a separate bowl
2 egg yolks
scant 1/2 cup sugar
1/4 teaspoon salt

Add the hot milk and rice slowly, whisking constantly, to the egg yolk and sugar mixture. Pour back into the double boiler and cook until thick (about 10 minutes would be my guess).

Remove the bowl from the heat and stir in the zest of half a lemon and 1 teaspoon of lemon juice and/or 1 teaspoon of vanilla extract. Gently fold in the two stiffly beaten egg whites (leftover from your two egg yolks earlier). It’s best warm, right after it’s made.

Enjoy!

Happy Valentine's Day

Good, Quick, Chocolate Cookie

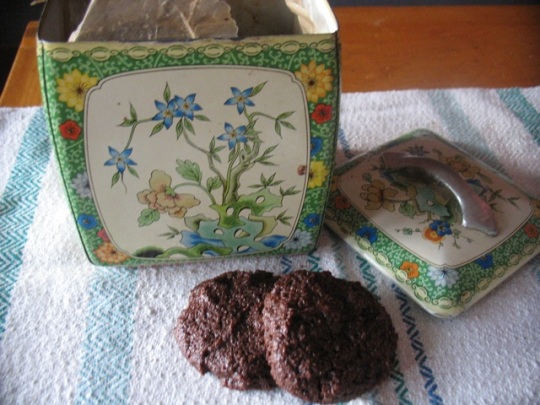
A tin of these fudgy chocolate cookies is a mighty nice thing to have around.

Lest you think it’s all root veggies and  greens around here, I present to you the quickest and one of the most satisfying cookies I make. Actually last Saturday was the first time ever that I taught a class and sent people home without a treat. Even for the students who had never been to a class and wouldn’t have known any better I had to do a spiel about how this class was shorter, focused on winter greens and how I managed to squeeze five dishes into our 90 minute class which is why they weren’t getting dessert. They were gracious and I think will return, however, I do love to bake and even if class time doesn’t permit the making or even eating of something sweet, there are always those little waxed paper bags concealing something for the road on your way out the door.

This cookie is in that rotation. And I, in my cook-with-what-you-have fashion, vary them each time. Sometimes I use whole-wheat pastry flour, sometimes spelt or sometimes just all-purpose. Today it’s golden raisins but sometimes it’s dried cherries or apricots. I even vary the amounts of cocoa a bit. And today I found a few tablespoons of orange marmalade in the fridge as I was preparing to make these and ended up mixing that in. I’ve always loved the combination of orange and chocolate and I’m definitely going to repeat that variation.

So if you have 20 minutes (that includes the baking time!) and some cocoa on hand and a few other pantry basics you can have your chocolate/cookie fix in no time. And you mix the dough in a sauce pan so clean up is fairly minimal too.

You start by melting the butter and then adding the cocoa and sugars and then all the remainder of the ingredients right in the saucepan.

Fudgy Chocolate Cookies
–adapted from pastry chef, writer, food stylist and friend Ellen Jackson

You can mix these incredibly easy, fudgy cookies right in the saucepan. I add golden raisins or chopped dried apricots, cranberries or dried cherries or chopped crystalized ginger to these depending on what I have on hand. In today’s batch I added a couple of tablespoons of orange marmalade (a definite winner), in addition to golden raisins. You can also omit the dried fruit or add nuts and dried fruit.

1 cup all-purpose flour, spelt or whole wheat pastry flour
1/4 teaspoon baking soda
1/8 teaspoon salt
5 tablespoons butter
6-7 tablespoons unsweetened cocoa
1/2 cup granulated sugar or coconut sugar
1/3 cup packed brown sugar or coconut sugar
generous 1/3 cup plain whole-milk yogurt
1 teaspoon vanilla extract
½ cups dried fruit (see headnote)

Preheat oven to 350°. Combine flour, soda, and salt and set aside. Melt butter in a large saucepan over medium heat. Remove from heat; stir in cocoa powder and sugars. Add yogurt and vanilla, stirring to combine. Add flour mixture, stirring until moist. Drop by level tablespoons 1 inch apart onto baking sheets. Bake at 350° for 8 to 10 minutes or until almost set. Don’t over bake and err on the side of underdone, if you like moist, chewy cookies that is. They will firm up as they cool. Cool on pans 2 to 3 minutes or until firm. Remove cookies from pans; cool on wire racks.

Apple Cider Syrup

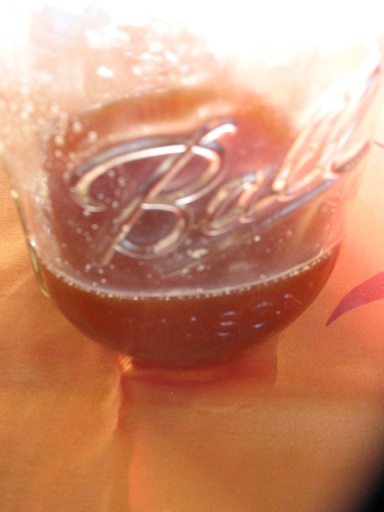
Apple cider cooked down to a syrup. Spectacular in salad dressings, cocktails, etc.

I have a few aces in my cooking repertoire, not that many, but a few. And this one is probably at the top of the list. Like most things I cook and teach it’s pretty straightforward, laughably simple actually. It came about a few years ago when I had lots of apple cider left over from my family’s cider pressing party. So I decided to reduce about a gallon of the cider until it just got syrupy which took my gallon down to about a pint. (If you reduce a bit too far, add some cream and a little salt for the most divine apple cider caramel sauce!)

I started using a teaspoon or two in salad dressings and I was hooked. The stronger winter greens this time of year are perfectly complemented by this “mystery” ingredient in the dressing. Countless times people have asked me what was in my salad dressing and a friend now can’t make big enough salads since her 8-year-old eats practically the whole bowl. I have to admit this has not worked with  my 4-year-old  . . ..

This syrup also inspired the Party Class I co-taught with cocktail wizard Scott Taylor this last weekend. He encountered the syrup in a Beans Class  (that by the way I’m teaching again with new recipes January 7th) earlier this fall and immediately went home and started mixing drinks with it. It is a winner mixed with bourbon, ginger syrup, bitters and lemon!

Cider syrup over Greek yogurt.

Beyond salads and cocktails the syrup is wonderful over ice cream or Greek yogurt, drizzled onto soups or braises or roasted vegetables or fruits, on pancakes or waffles. . .. It’s sweet and tart and complex and contributes almost anywhere. So go buy a couple of gallons of apple cider, reduce it and give your friends who like to cook and drink a little jar or it as a gift. Or just make a bunch and freeze some. It also keeps well in the fridge for several months.

And speaking of gifts, you might also give the gift of a cooking class (to yourself or others) this season– a gift that doesn’t clutter anyone’s home yet makes a daily difference for the tummy!

Apple Cider Syrup

1 gallon apple cider (not apple juice)

In a large pot or saucepan bring the cider to a boil. Let boil, uncovered until gallon has reduced to approximately two cups of syrup and consistency is thick enough to coat the back of a spoon. This can take anywhere from 40 to 90  minutes depending on the size of your pan, the strength of your stove, etc. Refrigerate or freeze when cool.

Apple and Quince Tart

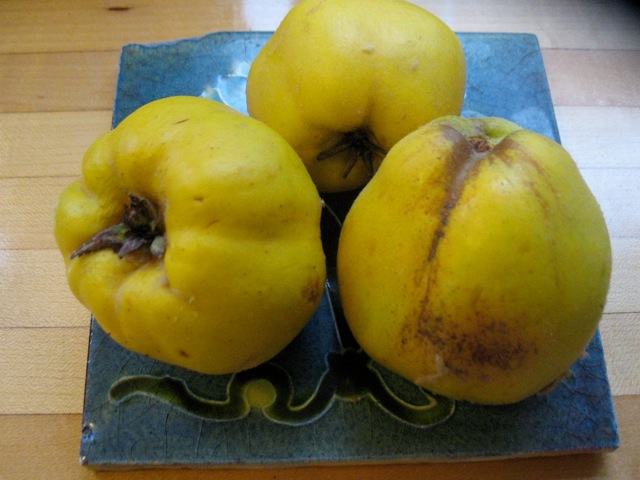
The last three quince from the little tree in my back yard.

Before we get into the tart I want to talk about veggies. And before we talk about veggies, you might have noticed that things look a little different around here. I’ve upgraded the blog a bit and combined it with my website. Now you can find everything Cook With What You Have in one place!  The recipes are newly categorized and more searchable and I’ve shared some of your feedback to my classes. A big thank you to Andrea Lorimor Photography and Brenna Switzer of Square Lines for making this transformation possible!

I can get carried away with salads and other dishes and keep adding things: nuts, cheese, dried or fresh fruit, lots of herbs, and so on and so forth. And I love all those things and I love them all together in salads but as I get ready for Thanksgiving I’ve decided to simplify, at least for this meal. I’m going to make a salad with just really good salad greens, maybe some whole parsley leaves and a simple dressing. And I’m going to braise some green cabbage as a side dish in a little butter with some onion and a dash of sherry vinegar at the end–nothing else.  There will be so much going on on the table that I think the simplicity will be nice. Maybe it’s because I cook and experiment so much that I’m craving these pared down versions. However, if this week is your chance to really cook and get creative, by all means do. It will be wonderful. But if you don’t want to buy a bunch of ingredients and do lots of chopping and planning, don’t be afraid of making something with a couple of ingredients and serving it proudly (with plenty of good salt and olive oil!).

Russet apples and quince

Now to the tart that kind of follows the above, simplified veggie theme. And it was a total cook-with-what-you-have process. I had combined the leftover pie dough from three pies from this weekend’s class into one ball and put it in the fridge. One of the doughs had ben for a savory tart and had been made with an egg and the other two were classic all-butter pie doughs. The chunk seemed about right for one single-crust tart or pie. I had three quince (I’ve been add ind a few quince to apple and pear sauce all fall and they are divine in this form too!) on the counter that needed using and a handful of russet apples. So I sliced the fruit, mixed in some lemon zest and a little sugar, a few tablespoons of reduced apple cider and some vanilla.

Sliced apples and quince with lemon zest

I baked the whole thing until it was bubbly and the fruit was tender, though that was a bit of a problem. I had tried to slice the quince thinner than the apples knowing they take longer to bake but if I were to do this again, I’d keep the quince and apples separate and put the quince in a layer right on the crust and then spread the apples over them. That way the quince would cook in the cider reduction that coats the bottom and be steamed a bit by the apples above and would probably cook in the same amount of time. I ended up just leaving it in the oven longer than would have been needed for the apples and all turned out fine. You could of course poach the quince for a few minutes first too.

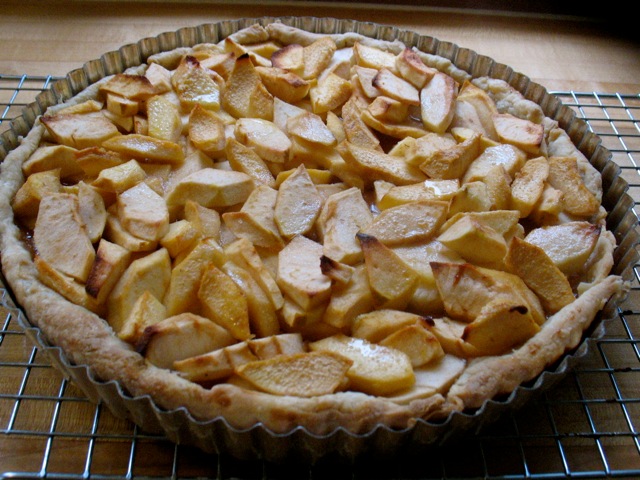
The finished product.

This is the kind of tart that you can eat several slices of and still not feel overly indulgent. It’s the opposite of the rich, gooey pecan pies or custardy pumpkin ones. And even with a dollop of whipped cream it’s on the lighter end of desserts so it might make a nice complement to the typical, richer fare this Thursday.

I hope you have a wonderful time cooking and eating this week. I’m so grateful for all the bounty we have and wish you all a warm, cozy place to be with a good plate of food and friends and family.

Happy Thanksgiving!

Apple Quince Tart

You could make this with pears and apples or just pears for a nice variation. You can use a favorite pie or tart dough recipe or the one below which includes an egg and is very easy to work with. You do not need to let this dough rest in the fridge, though you certainly can.

1 1/2 cups all purpose flour 
(or ¾ cup apf and ¾ cup whole wheat pastry flour)
9 tablespoons unsalted butter, chilled, cut into cubes
1/2 teaspoon salt
1 large egg
2-3 tablespoons cold water

Make the dough by mixing the flour and salt in a bowl. Add the butter and use your hands, or a pastry blender, to break in the butter until the mixture has a crumbly, cornmeal-like texture. Mix the egg with 2 tablespoons of the water. Make a well in the center of the dry ingredients and add the beaten egg mixture, stirring the mixture until the dough holds together. If it’s not coming together easily, add the additional tablespoon of ice water. Gather the dough into a ball and roll the dough on a lightly floured surface, adding additional flour only as necessary to keep the dough from sticking to the counter. Roll it out a bit larger than your tart pan and fit the dough into in snugly. Fold any rough edges over on itself even with the rim of the pan and press into the side of the pan.

Preheat your oven to 425.

Filling:

about 5 cups sliced apples and quince (or apples and pears, see headnote), keeping apples and quince separate
1/3 – 1/2 cup sugar (depending on tartness of fruit)
zest of half a lemon
3 tablespoons reduced apple cider*
1 teaspoon vanilla
1 1/2 tablespoons butter

Depending on your ratio of quince to apples mix each with the respective amount, more or less, of sugar and lemon zest. Mix the reduced cider and vanilla in a small bowl. Spread the quince on the bottom of the unbaked tart shell. Spread the apples over the quince and then drizzle the cider vanilla mixture evenly over the fruit and dot it with little pieces of butter. Bake for about 45 minutes until all the fruit is tender and is starting to brown around the edges.

*I keep reduced apple cider on hand to add to salad dressings and many other dishes this time of year. You just reduce 1/2 gallon of cider down to about 1 1/2 cups for a nice, slightly syrupy consistency.

Perfect Pie

A sour cherry pie I made this summer.

I’m compelled to post about pie several times a year, but especially and most regularly, this time of year. Cakes and quick breads are great, as are cobblers and cookies but pies evoke more superlatives for me than all else. Maybe it’s my family’s Thanksgiving tradition that involves more pies than seem reasonable but after all, it’s really about being able to have pie for breakfast (and lunch and dinner!) the day after Thanksgiving. It’s about crimping that dough and praying that it won’t droop in the hot oven in all its buttery goodness. And it’s about apples and pumpkins, nuts and even leafy greens with eggs and spices that fill those buttery shells, that makes me happy.

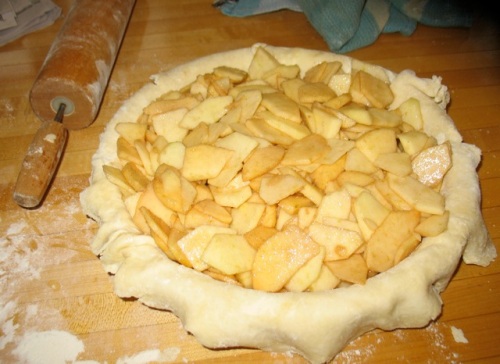
Apple Pie waiting to be covered and crimped (my favorite part).

I’m dying to try this pie and this crust (even though I’ve always stuck with all-purpose flour for pie crust) and finally trying butternut squash instead of pumpkin in a “pumpkin” pie  . . .as I’m getting ready for the annual Pie Class at Cook With What You Have. I’d love for you to come, share your pie stories, roll pie dough and slice fruit and enjoy a meal of pie, both sweet and savory (and a salad or two) on a cozy Saturday! Saturday, November 19th that is–the weekend before Thanksgiving–so you’ll have license to ignore other household tasks or work to come make pie because you’ll improve everyone else’s day the following Thursday with your home-made beauty!

Baked Apples

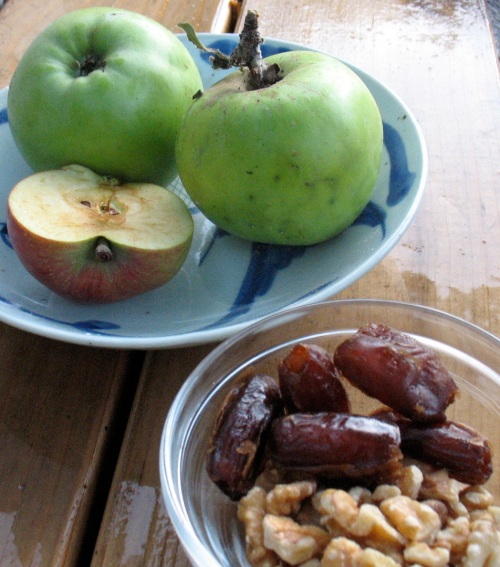
Here are the key ingredients for this dish though any number of substitutions for the nuts and dried fruit would be great . . .raisins, dried cranberries, cherries or apricots; almonds, pecans. . . .

I’m testing all kinds of healthy desserts for part of a series of classes I’m teaching at Columbia Sportswear this fall. I know ‘healthy’ is a terribly subjective term but I’m focusing on dishes that traditionally don’t use lots of refined sugars and flours (like these Baked Apples) or adapting ones that do, to use less of those things.

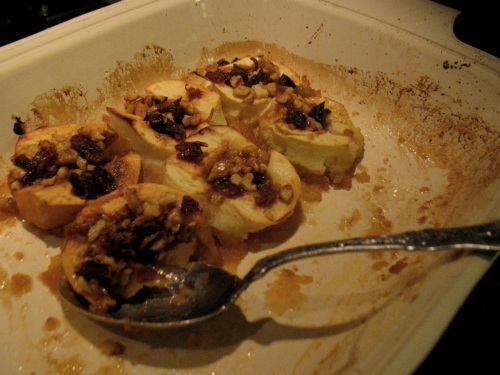
Baked Apples filled with walnuts, dates, a little butter and coconut sugar.

It’s a lot of  fun and I loved these apples I made last night for our dessert and loved them even more for breakfast this morning with Greek yogurt and maple syrup. Many European countries have a variation of this dish (which is also delicious with pears) and I grew up with some German renditions of this. The below recipe was loosely inspired by Dorie Greenspan’s in Around my French Table, however, I simplified it significantly. Enjoy!

I’m also having fun testing soups these days in preparation for Fall Soup Class which still has a few spots. So far I think there will be a pureed chickpea soup with cumin and lemon; a leek soup; a potato chowder and a soup with different kinds of beans and greens!

Breakfast of baked apples topped with Greek yogurt and maple syrup.

Baked Apples 

4 apples, cut in half, peeled and cored (or pears or quince)

4 tablespoons chopped walnuts, almonds, hazelnuts or pecans

1/2 cup of chopped dried fruit (dates, raisins, dried cranberries, cherries, prunes or apricots)

2-3 tablespoons coconut sugar or brown sugar (or 1 -2 tablespoons honey)

1/2 teaspoon cinnamon

1/4 teaspoon sea salt

4 tablespoons (1/2 stick) butter, cut into small pieces

3/4 cup apple cider or water

Preheat oven to 375 degrees.

Place the apples cut side up in the 9 x 13 baking pan. They should be fairly snug so they stay upright and hold their filling. Put a small piece of butter into each hollow (where the core used to be)

In a small bowl, mix the cinnamon, sugar (or honey), salt and nuts and dried fruit. Divide this mixture evenly among the hollows of the 8 halves. Dot each half with another piece of butter. Pour the cider or water into the pan and sprinkle the remaining butter onto the liquid in the pan.

Bake until the apples are nice and tender (but not falling apart) which can be anywhere from 45 – 70 minutes depending on the size and kind of your apple. Baste with the buttery juice every 15 minutes.

Let cool for a few minutes before eating or eat at room temperature as is or with Greek yogurt, sour cream, creme fraiche or whipped cream.